Thought I will document this as it may come in handy for others looking to do a similar thing using Advanced policies in NetScaler.
I recently rolled out a project for enabling SAML authentication for Azure MFA using Citrix FAS (for Single Sign ON). There were a few key findings from that piece that I will publish on another blog post. This is a quick one for the advanced session policies that were used for ICA Proxy access. Moreover, we had a task of getting native Workspace App or Receiver client to also work with SAML authentication. Having said that, the below steps would work just fine for a SAML and non-SAML approach.
Creating Session Profiles for Web Browser access
First step is to create the Session profiles and for that, navigate to
Citrix Gateway > Policies > Citrix Gateway Session Policies and Profiles > Session Profiles
Click Add

Give the Session Profile a Name
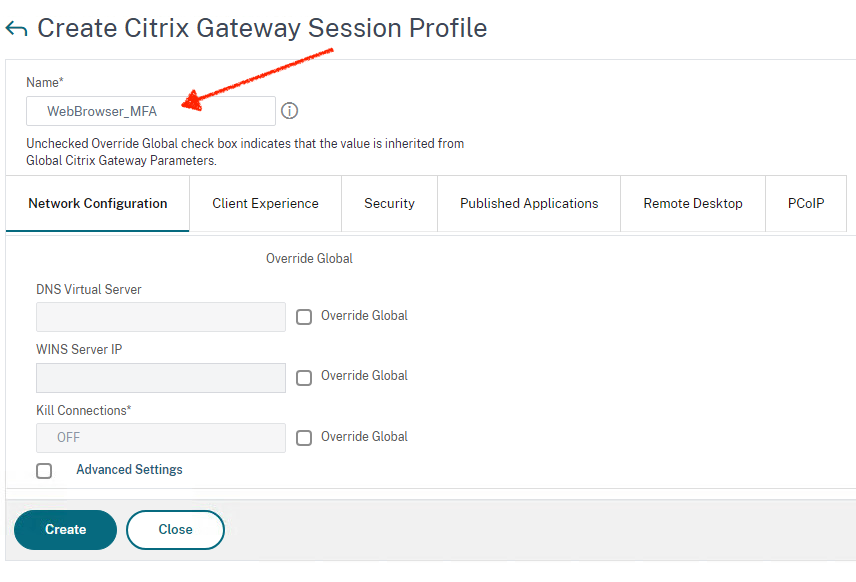
Leave the Network Configuration tab as default
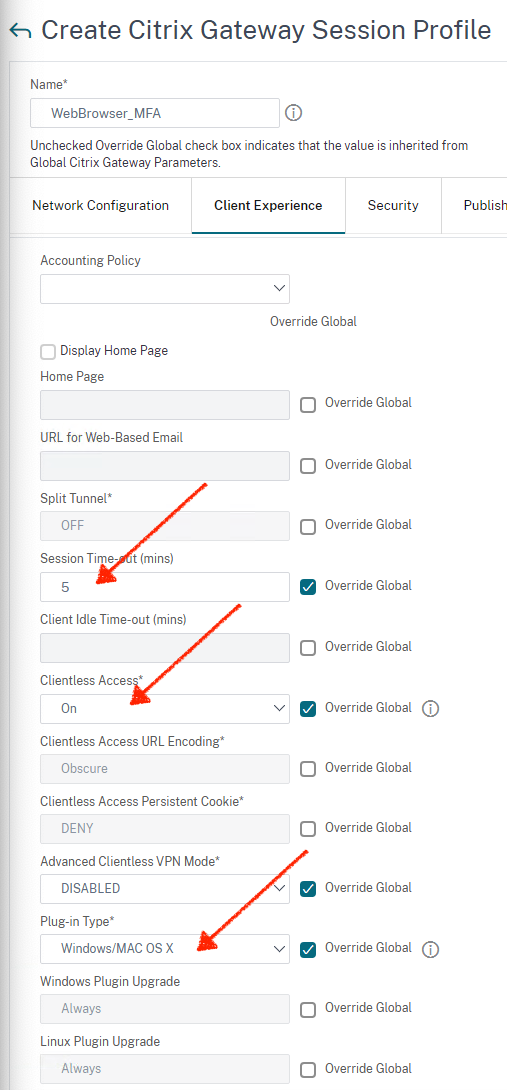
Under Client Experience, configure as below
- Session Time-out: Enter the time in minutes. Ensure that the timer is set to a lower value than what’s configured on the Storefront
- Clientless Access: On
- Plugin type: Windows/Mac OS X
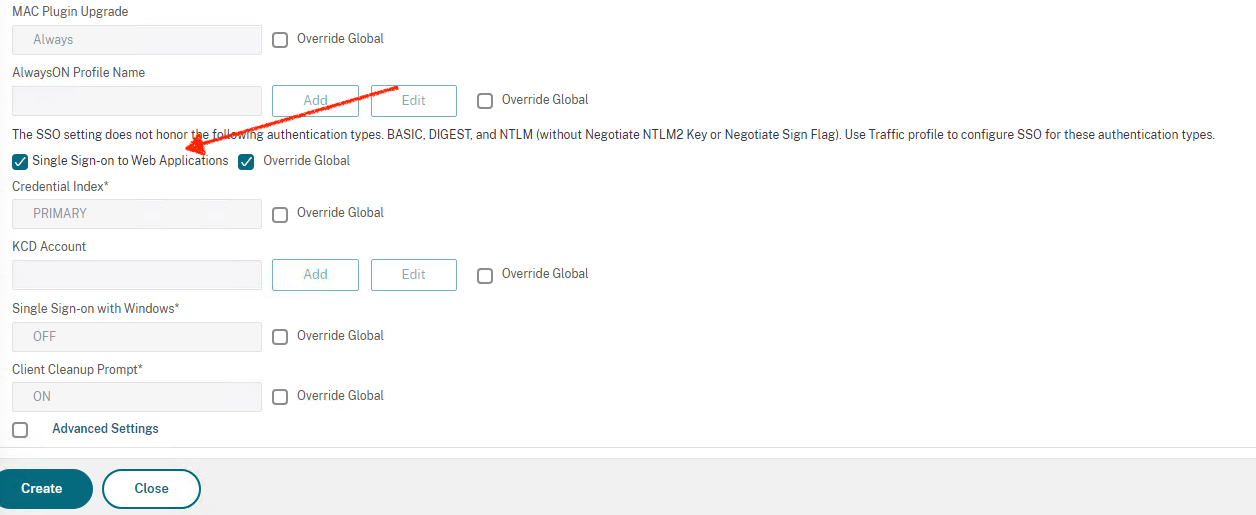
Select Single Sign-on to Web Applications. This setting may not be required anymore, but I always did this in the past so leaving it turned ON.
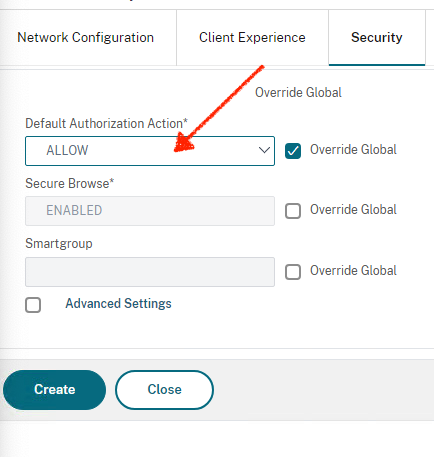
Click on Security tab, configure Default Authorization Action to ALLOW
In the Published Application tab, enable the following settings:
- ICA Proxy: Set to ON.
- Web Interface Address: FQDN of the StoreFront server or load balanced Storefront VIP address followed by the path to the store for web
- Single Sign-on Domain – NetBIOS name for the domain. If you have multiple domains, make sure that you have captured all the domain names in Storefront under “Manage Authentication Methods” and you leave the domain name field blank on the Session profile. if that doesn’t work, change the SF to use “Any Domain” and leave the Session profile on the NS blank.

Click Create
Creating Session Policies for Web Browser access
Click on the Session Policies tab

Click Add
Give it a Name and select the Session Profile created in the previous step
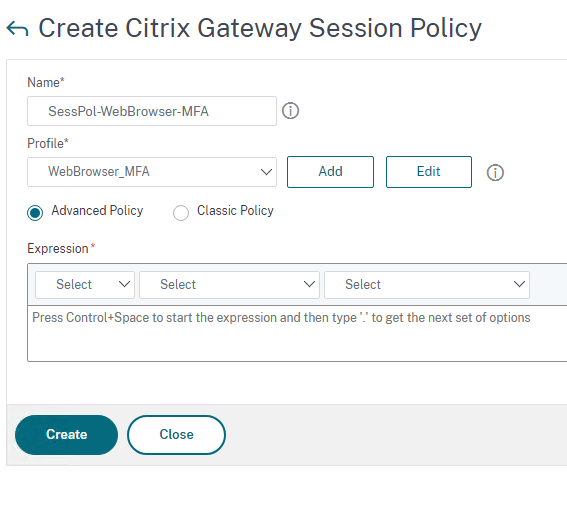
Click Advanced Policy and then click on Expression editor towards the right
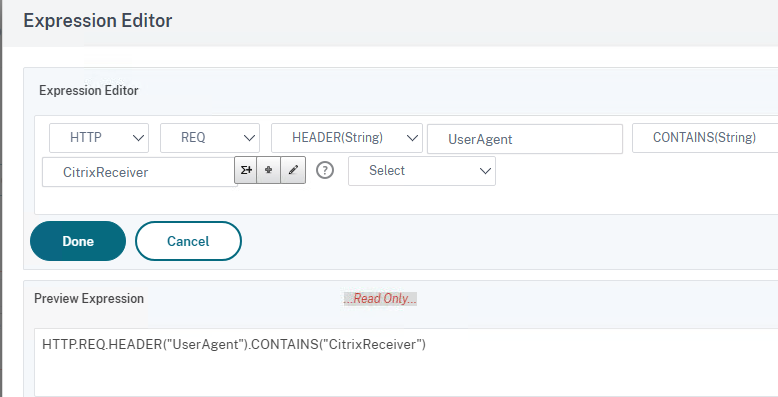
In the Expression Editor, choose the parameters as given in the snippet below
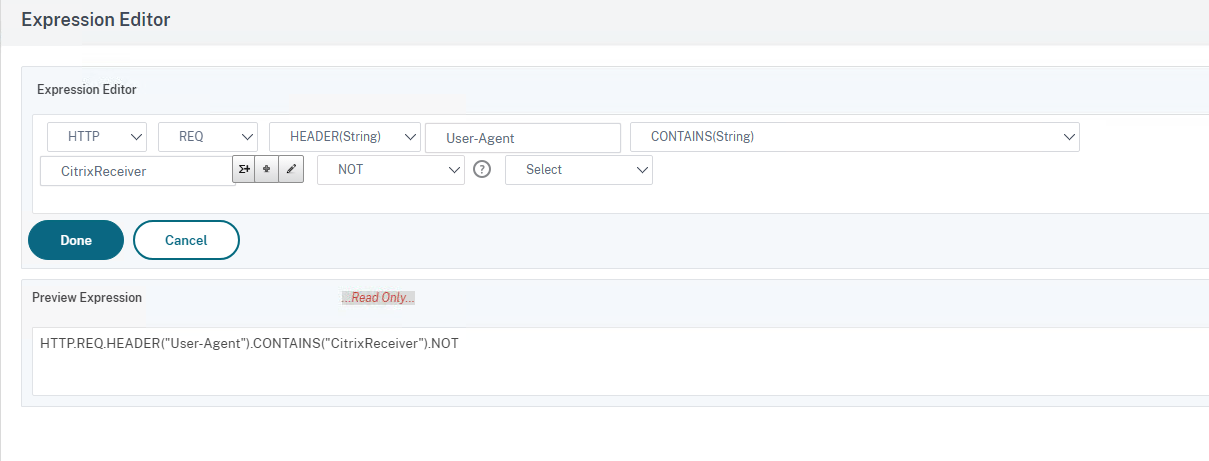
You will need to type in those entries denoted by the arrows
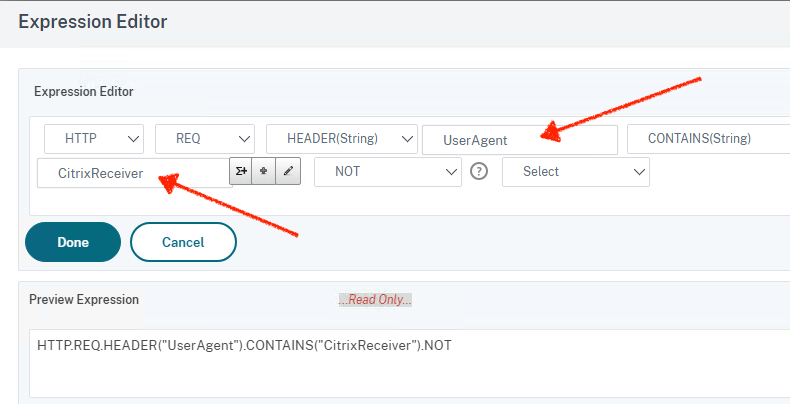
Click Done
Now click Create
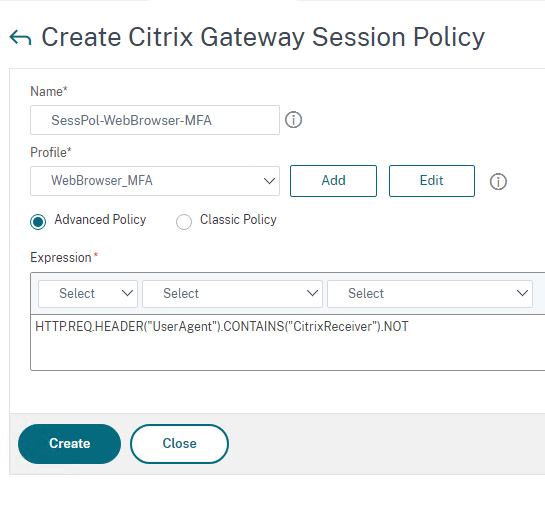
You should now see the policy that you created.
We now need to create another policy and profile for Citrix Receiver or Workspace App access
Creating Session Profiles for Citrix Receiver or Workspace App access
Click on Session Profiles Tab and click Add
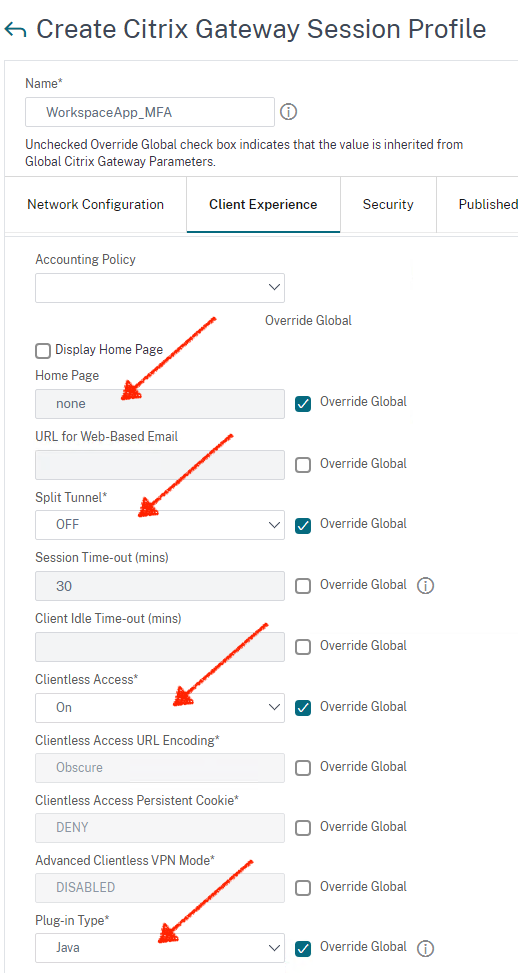
Give the profile a Name
Click on Client Experience tab
- Home Page: Set to none
- Split Tunnel: Set to Off
- Session Time-out: Add a value in mins that suits your org. I have left it to default of 30 mins. (The gateway timeout value should be lower than the Storefront time-out for SAML authentication to work correctly)
- Clientless Access: Set to On
- Plug-in Type: Set to Java
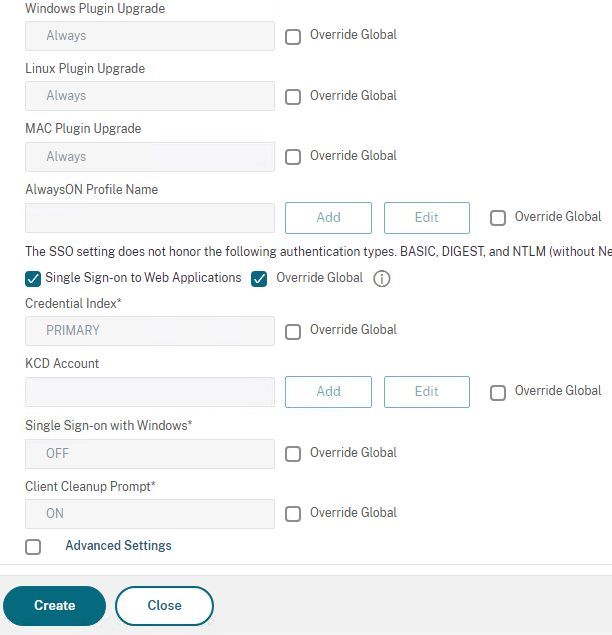
- Single sign-on to Web Application: Select the check box
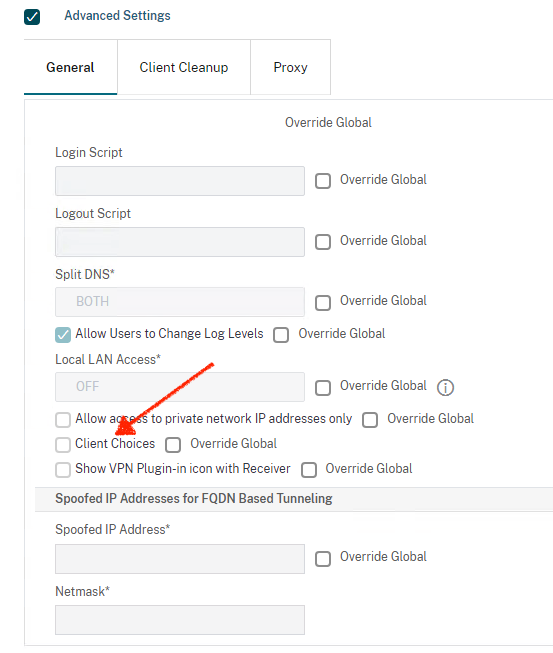
Click Advanced settings, clear the Client Choices
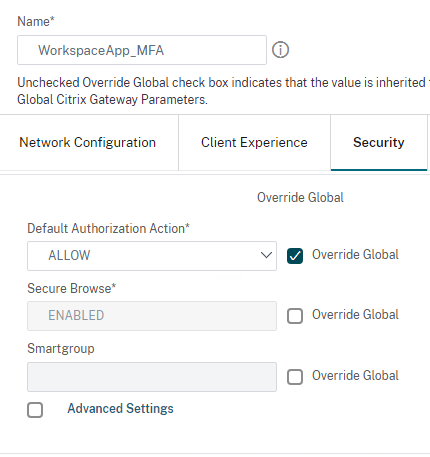
Click Security tab and set Default Authorization Action to ALLOW
In the Published Application tab, enable the following settings:
- ICA Proxy: Set to ON.
- Web Interface Address: FQDN of the StoreFront server or load balanced SF VIP address followed by the path to the store for web
- Single Sign-on Domain: NetBIOS name for the domain. If you have multiple domains, make sure that you have captured all the domain names in Storefront under “Manage Authentication Methods” and you leave the domain name field blank on the Session profile. if that doesn’t work, change the SF to use “Any Domain” and leave the Session profile on the NS blank.
- Account Services Address: Enter the account services address or the gateway address. The last back slash is important. For example,
https://gateway.citrix.com/or https://workspace.company.com
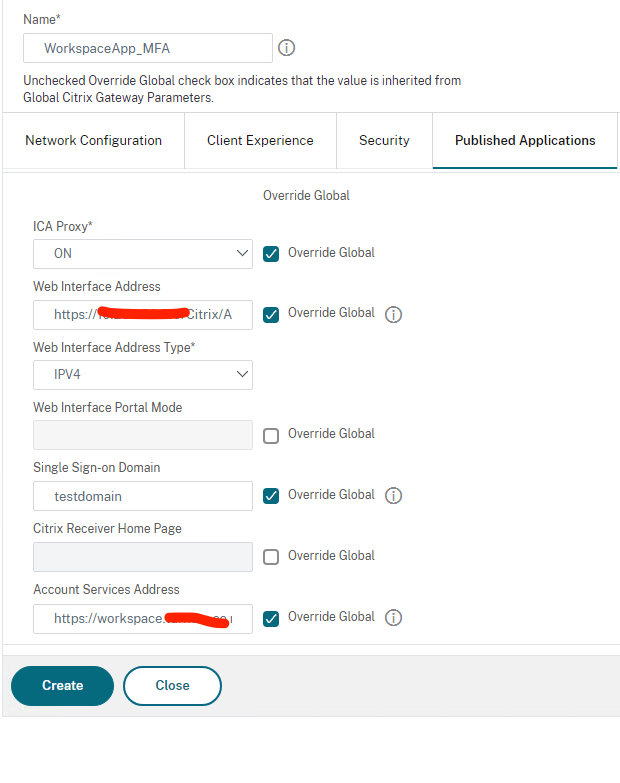
Click Create
Create Session Policy for Workspace App access
Click on the Session Policies tab and click Add
Give it a Name and select the WorkspaceApp_MFA profile we created in the previous step
Select Advanced Policies and click on Expression Editor
Provide the values as below
Click Done
HTTP.REQ.HEADER("UserAgent").CONTAINS("CitrixReceiver")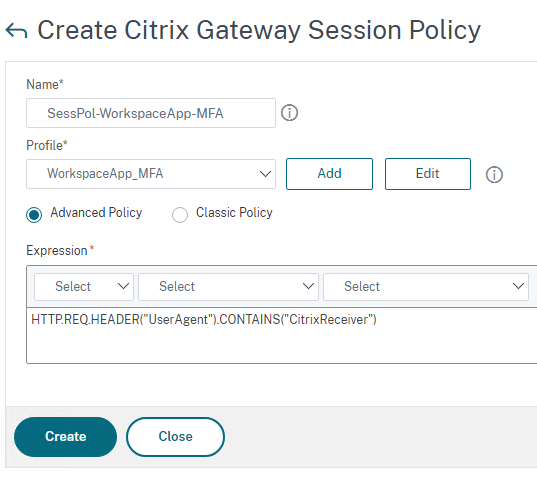
Click Create
Bind the Policies
Once you have the policies created, all you need to do is to bind them to the Gateway vServer as Session Policies.
Lessons from the field – SAML Authentication
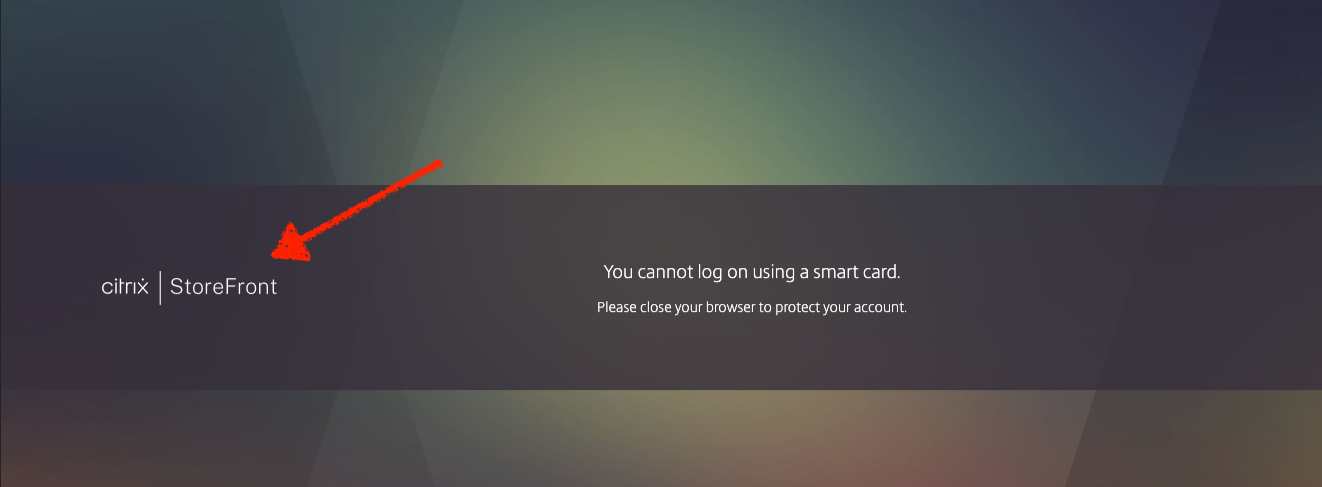
When you have SAML authentication going on, you may run into the below issue where the NetScaler gateway or Storefront page will expire the login page and users will have no way other than to open the Gateway or Storefront portal in an incognito browser window to get going again. There is a fix for this now and the fix could be applied either on the Storefront server or the NetScaler gateway depending on which instance is throwing the error.
In our instance, though it was the gateway login page where users need to log back onto, the timer expiry error was send by the Storefront as denoted by the arrow in the snippet below
You cannot log on using a smart card.
Please close your browser to protect your account.
Fix is to add an entry towards the end to script.js file under the relevant SF store
Steps:
- On the StoreFront server , navigate to C:\inetpub\wwwroot\Citrix\<StoreName>Web\custom
- Right Click script.js and open in a Notepad (as Administrator) add below content to the end of the file
CTXS.allowReloginWithoutBrowserClose = true - Save the file
- Run command “iisreset”
- Propagate the changes to the other SF servers, if it is a cluster.
If it is the NetScaler gateway, the steps are slightly different and performed straight on the NetScaler or ADC. use WinSCP or PuTTy to make the changes.
Steps:
- On the NetScaler , navigate to /var/netscaler/logon/LogonPoint/custom/script.js
- Edit the script.js file and add below line to the end of the file
CTXS.allowReloginWithoutBrowserClose = true - Save the file

Leave a Reply