Here is a quick and easy way to load balance your Citrix Director instances in a XenApp or XenDesktop environment.
Below is my environment
- Citrix Director servers ( Controller servers in most cases) – director-1 and director-2
- A NetScaler HA pair ( you can do this on a stand alone NetScaler as well)
Monitors
Firstly, create a monitor for the Director services
Navigate to Traffic Management >Load Balancing >Monitors and click Add

Give it a name and select type as HTTP ( if there are no SSL certificates installed on the Director servers). Click on the Special Parameters tab and under the HTTP Type box, enter GET /Director/LogOn.aspx?cc=true
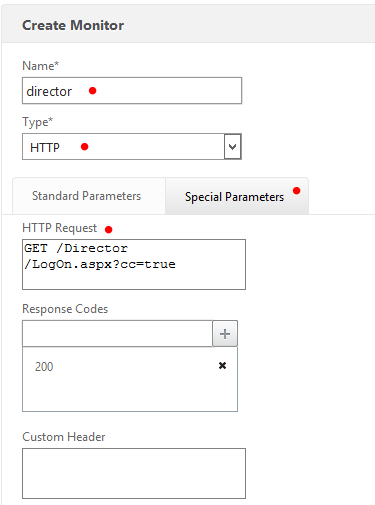
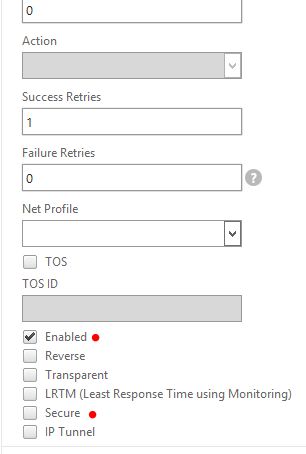
Before you click Create, ensure that it is enabled and Secure box is ticked if SSL certs are being used.
Click Create
Servers
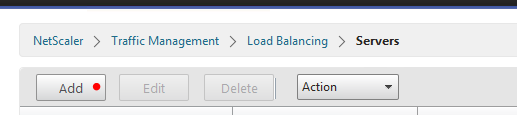
- Second step is to create Servers
Navigate to Traffic Management >Load Balancing >Servers and click Add
Add your Director servers here
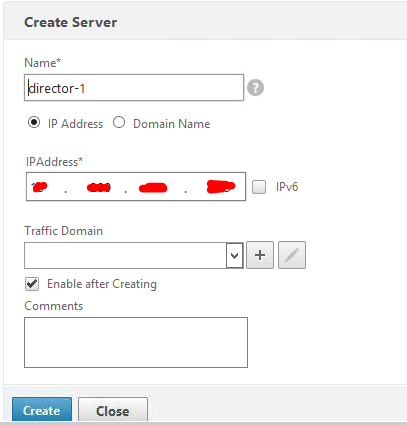
Similarly, add the second Director servers as well
Service Groups
- Now create the Service Group
Navigate to Traffic Management >Load Balancing >Service Groups and click Add

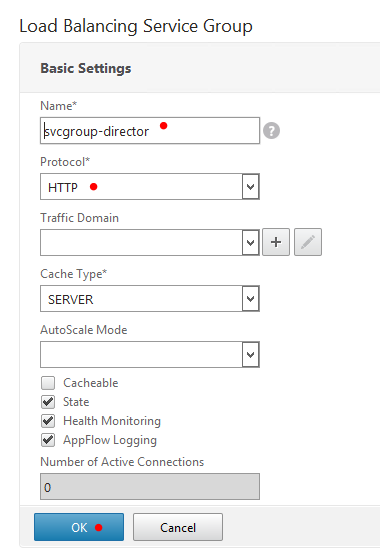
Give the Service Group a name and protocol is HTTP and click OK
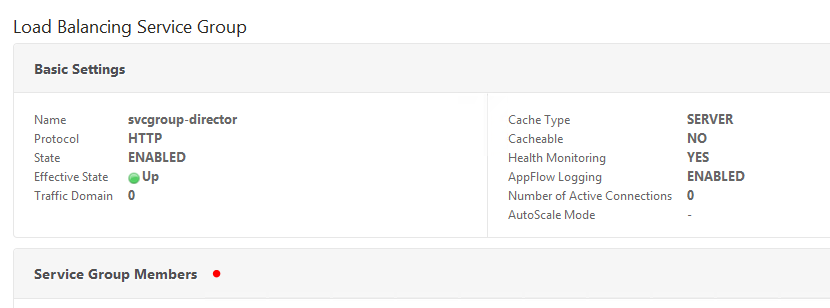
Now Edit the service group that was just created and click on Service Group members and add the newly created services, director-1 and director-2
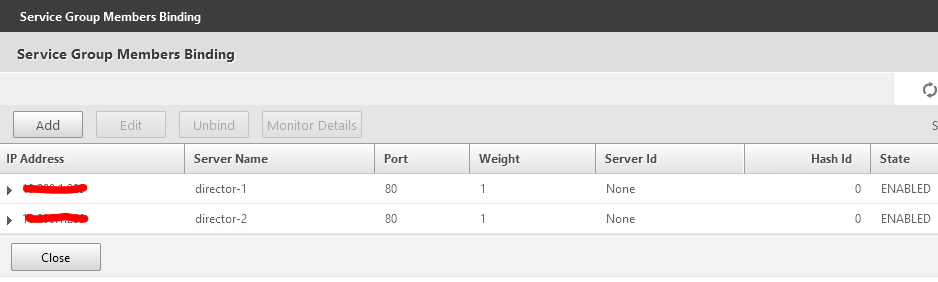
Once added, it will look like the below
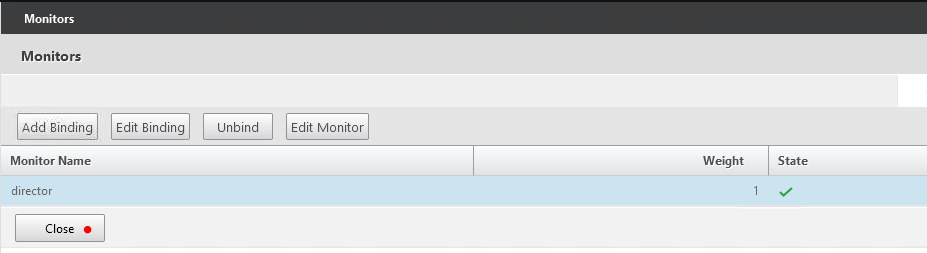
Click Close. Click on the Monitors link as below and add the monitor that was created in Step 1
Once add the screen will look like the below. Click Close
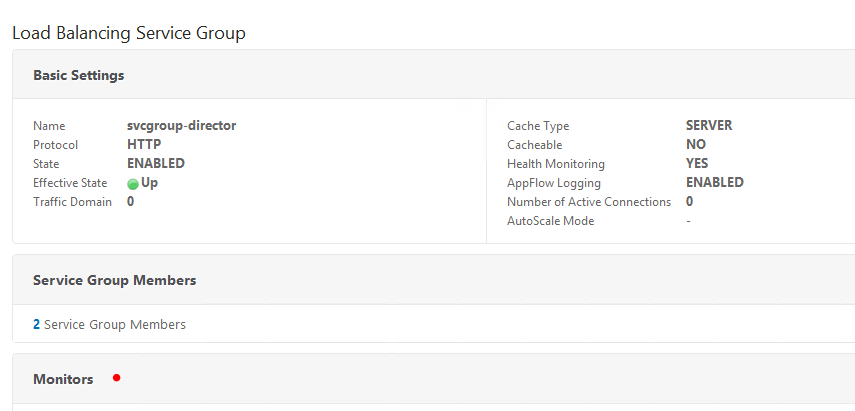
The service group will look like the below once the above steps are completed.
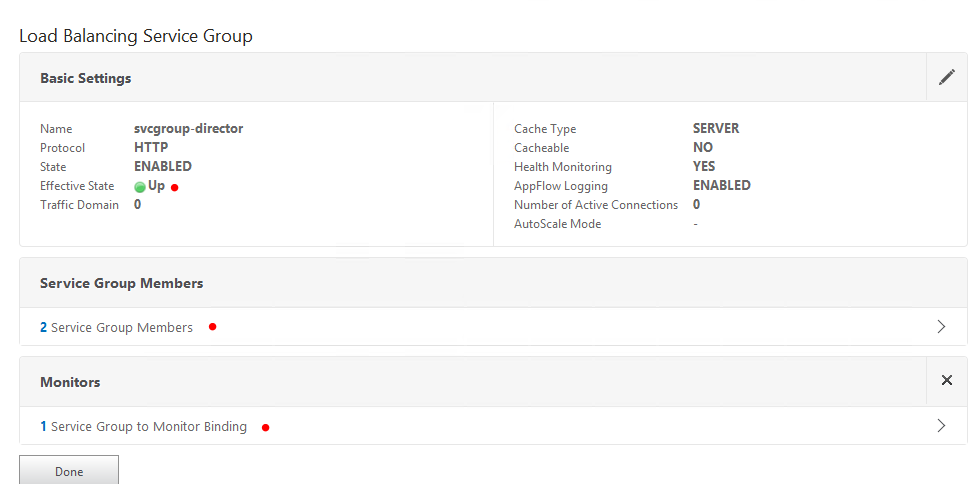
Click Done
Responder Policy
A Responder policy needs to be created to redirect the users from the root of the IIS web server to the Director page.
Please note that Responder feature may need to be enabled first before you can use it.
Click on the + sign next to AppExpert and select Responder. Right click and choose Enable Feature. The yellow exclamation mark will disappear when you do that.
Once enabled, Navigate to AppExpert >Responder > Actions
Now think of a nice name to call the load balanced Director instance. you will need to add a DNS host entry later on for this name. the name that i have chosen is director
Give it a descriptive name and use the drop down for Type to select Redirect
Under Expressions, type the string here with the quotes as below
"http://director.domain.co.nz/Director"

Click Create
Time now to create the Responder policy. The one that we created earlier was a Responder action.
Give a descriptive name to the Responder policy and under the Action drop down menu, select the name of the action that was created in previous step. Under the Expressions field, type
HTTP.REQ.URL.CONTAINS(“Director”).NOT
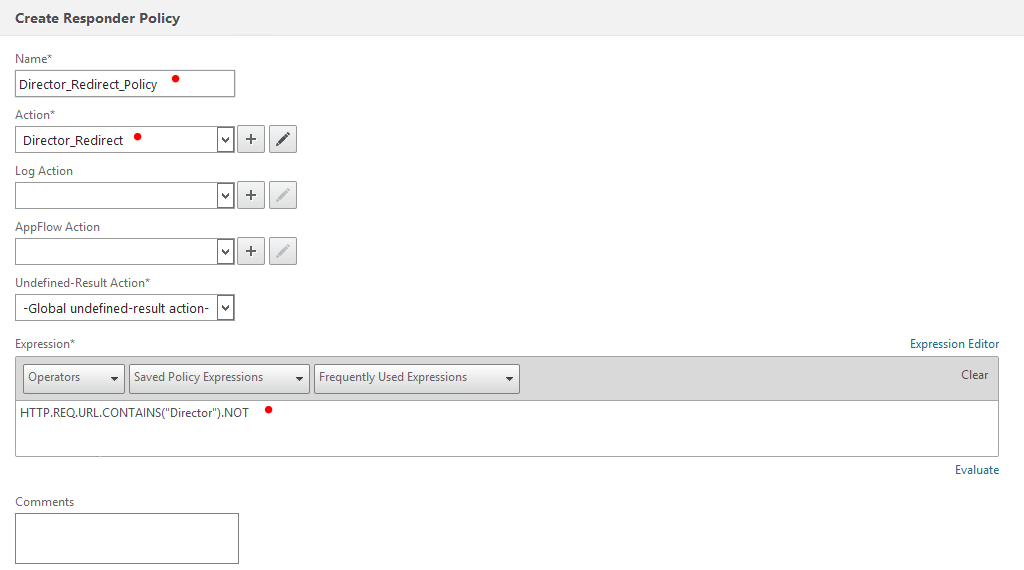
Click Create
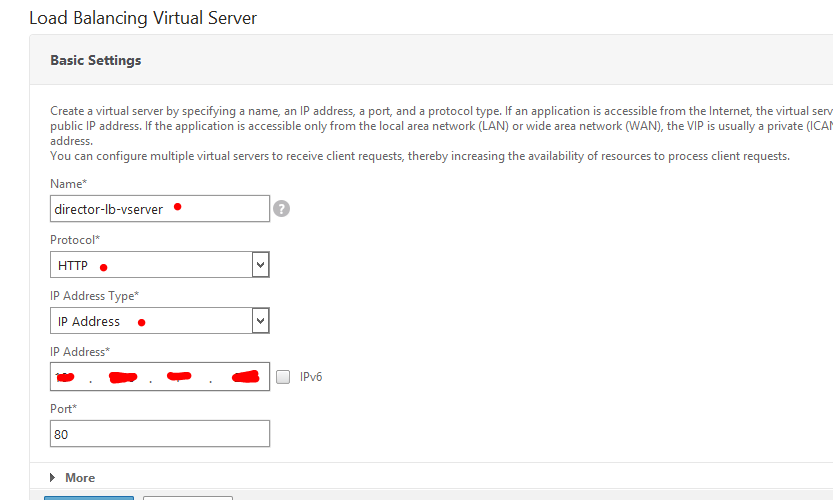
Virtual Server for Load balancing
Reserve an IP address to use for the virtual server.
On the left, navigate to Traffic Management >Load Balancing >Virtual Servers and click Add on the right. Give it a name and select the Protocol as HTTP
Specify the IP address for virtual server and the port number as 80. Click OK. Note that in production environments, use secure Director access by using an SSL certificate. For the purpose of demo, we are using an unsecure connection
On the page where it says, Services and Service Groups, click No Load Balancing Virtual Server ServiceGroup Binding
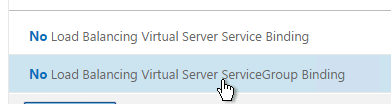
Add the service group that was created in earlier steps
Click Continue
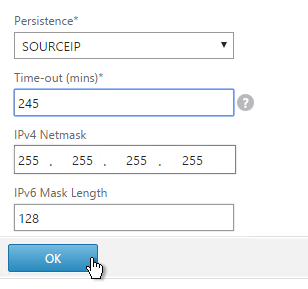
On the right hand side under Advanced Settings, Click Persistence
Select SOURCE IP as the Persistence and change the timeout value to 245 ( the default time out value for Director is 245 mins). Leave the rest of the settings as defaults and Click OK
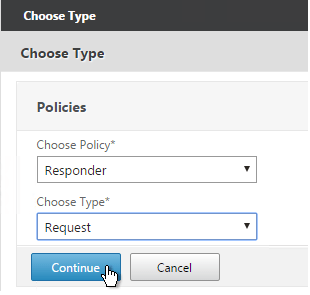
Now, move on to the right hand side again and select Policies
Select Responder as the policy and Type as Request and click Continue
 .
.
Select the redirect policy created earlier and click Bind
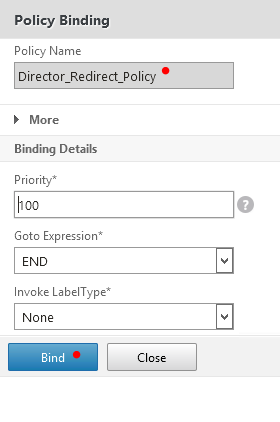
Click Done
Ensure that the virtual server is marked as UP in green.
DNS Config
Create a host A record in DNS for the name which in my case is director
Test the Director URL and ensure that it redirects you to the correct URL and also login and confirm that Director is usable.
That’s all you need to do to setup Director load balancing using NetScaler.

Leave a comment