
It’s been a while since I wrote on my blog so let’s get straight into the post without much mucking around. This time we will discuss how to go about setting up Storefront load balancing using NetScalers. This can be configured on a standalone NetScaler or a NetScaler pair in HA. The recommendation is obviously to get this setup on a HA NetScaler pair so that NetScaler outage wouldn’t result in Storefront also being unavailable.
My Storefront version is 3.11 and have a cluster with 2 Storefront servers. NetScaler version is 11.1 but the NS version shouldn’t matter much as the steps would be more or less the same for other NetScaler firmware versions – newer or older. (unless you are too far behind)
Pre-Requisites
To configure Storefront load balancing we need the following –
- 2 or more Storefront servers
- an IP address for the virtual server that hosts the LB configuration
- SSL certificate that points to the intended load balanced URL of Storefront – the certificate can be a wild card or a named certificate
First Things First
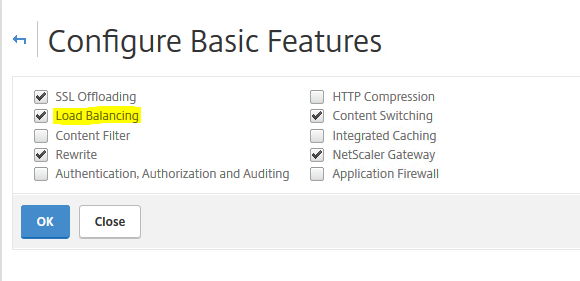
Logon to your NetScaler and navigate to System — Settings — Configure Basic Features. Ensure that Load Balancing is selected, if not select it and click OK
NetScaler Configuration
Create Servers
Now, navigate to Traffic Management — Load Balancing — Servers. Click Add

Give the Storefront server a name and enter the IP address of the server. Ensure that “Enable after creating” is selected. Click Create
Add the second Storefront server following the above steps. If you have more than 2 servers, add all of them.

Create Monitors
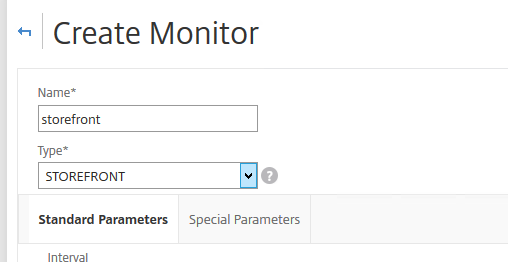
New NetScaler version come with a built-in Storefront monitor so we are going to make use of it here. Go to Traffic Management –Load Balancing — Monitors and click Add
Here I am only going to create a single monitor to probe all my Storefront servers. You can choose to create multiple monitors depending upon the number of Storefront servers that you have. In my case, i will create just one.
Give a name to the monitor and select the type as STOREFRONT
Now select Special Parameters tab and provide the name of the Store that you have created in Storefront. Check the 2 entries – Storefront Account Service and Check Back End Services.

If you had selected “Check Backend Services“, you will need to perform the steps in the Storefront Changes section later down in this post. Else, you could completely ignore checking that option.
Click on the Standard Parameters tab. Ensure that Secure is selected as below. Click Create

Create Service Groups
Go to Traffic Management –Load Balancing — Service Groups
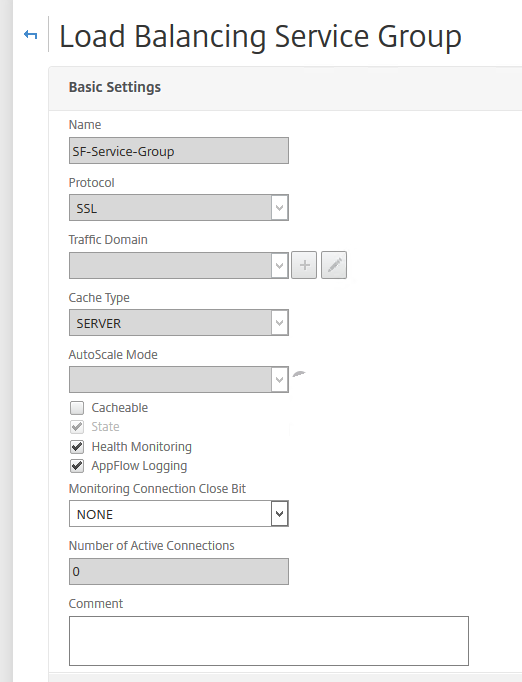
Give a name to the service group and select the protocol as SSL. Check the entries below
- State
- Health Monitoring
- AppFlow Logging (only if you have NetScaler MAS in your environment)
Click OK
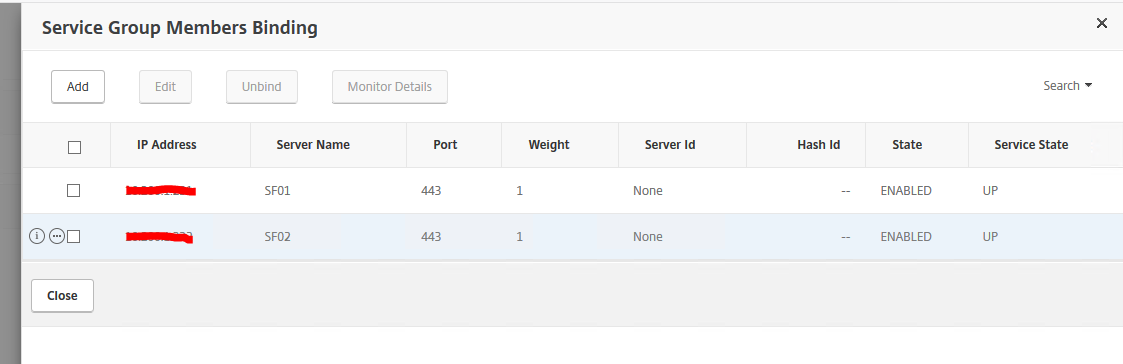
Under Service Group Members, add the server entities that we created earlier. Once done, they will look like the below
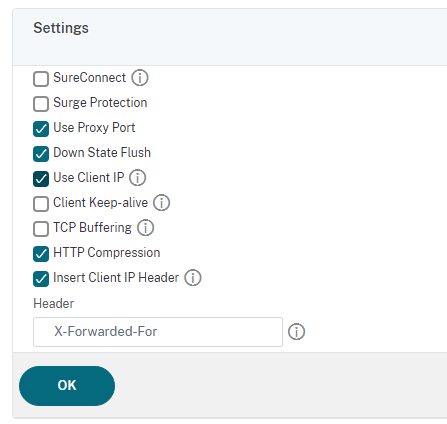
Under Settings, type the Header as X-Forwarded-For
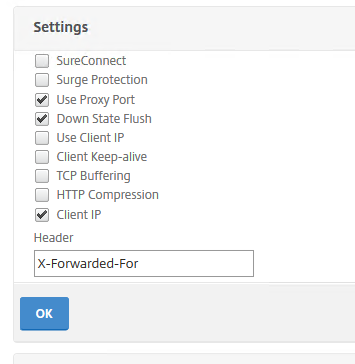
For newer NetScaler firmware versions, the below option are to be ticked
Under Monitors, bind the monitor that we created before

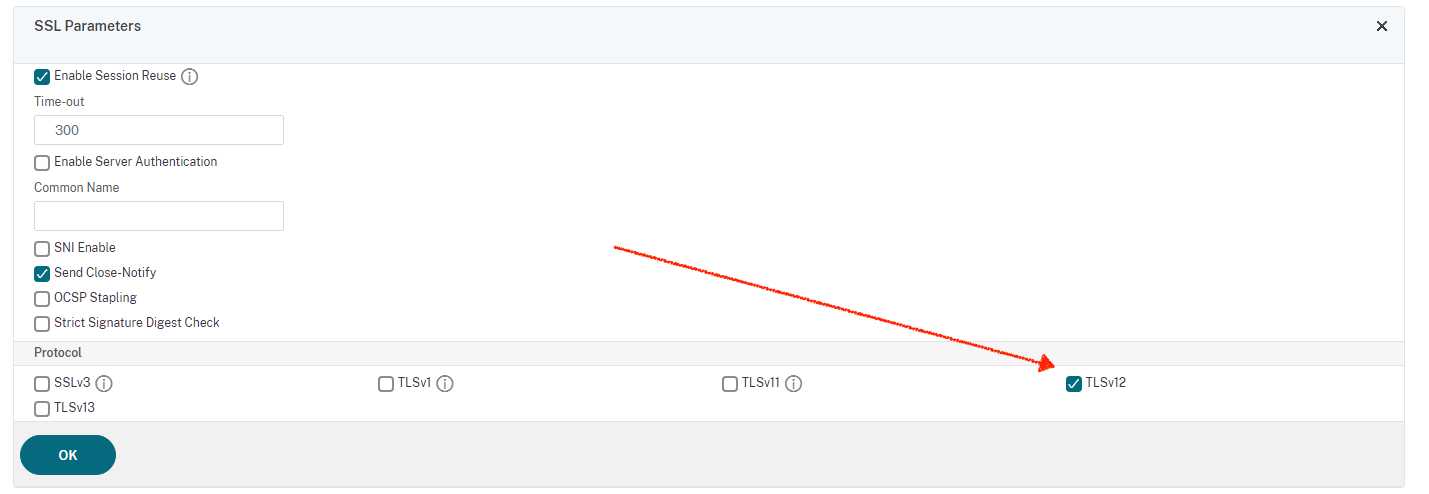
Under SSL Parameters, setup the settings as below
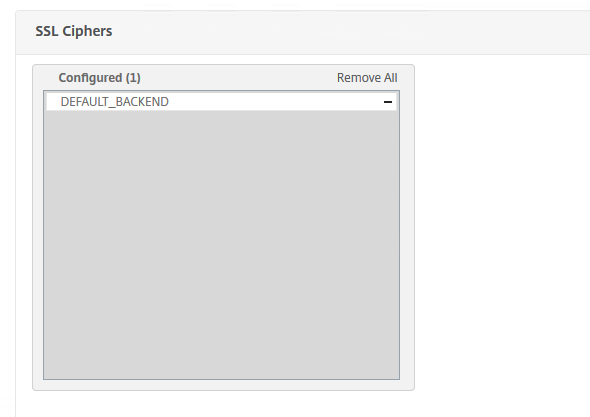
Under Ciphers, setup the ciphers based on your company security policy.
Once done, Service Group for Storefront should look like this

Now, it’s time to create the Virtual Server
Virtual Server
As mentioned in the pre-requisites section , we need an IP address for this. If the NetScalers are sitting in the DMZ, a DMZ IP address is required. In my case, NetScalers are hosted internally so i will use an internal unused IP address.
We will also need the SSL certificate here.
Go to Traffic Management –Load Balancing — Virtual Servers
Click Add
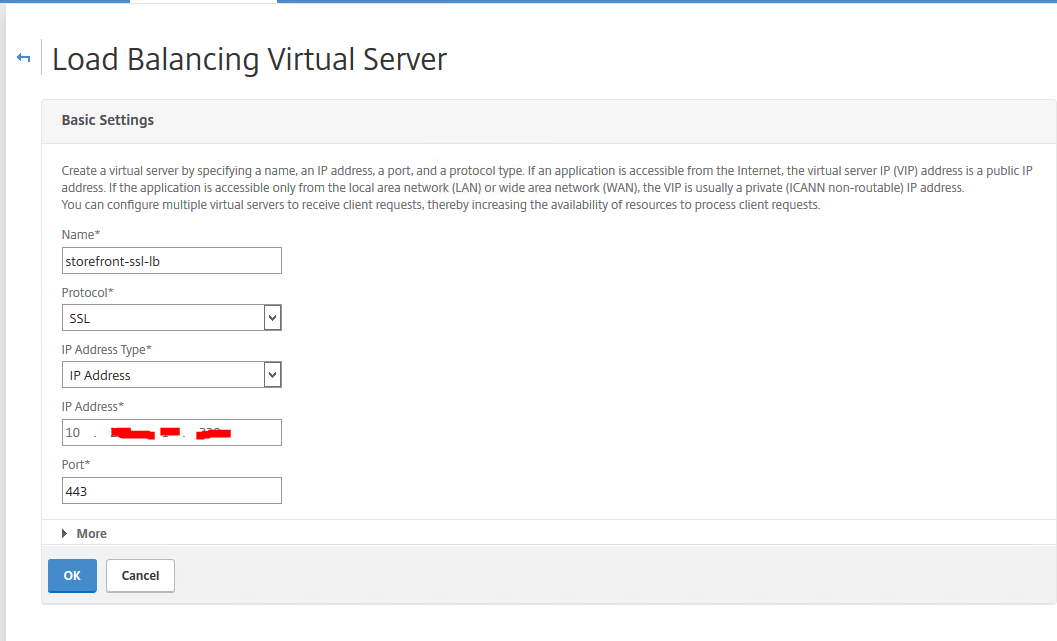
Give a Name to the virtual server and select the protocol as SSL
Specify the IP address under IP Address field and specify the port # as 443
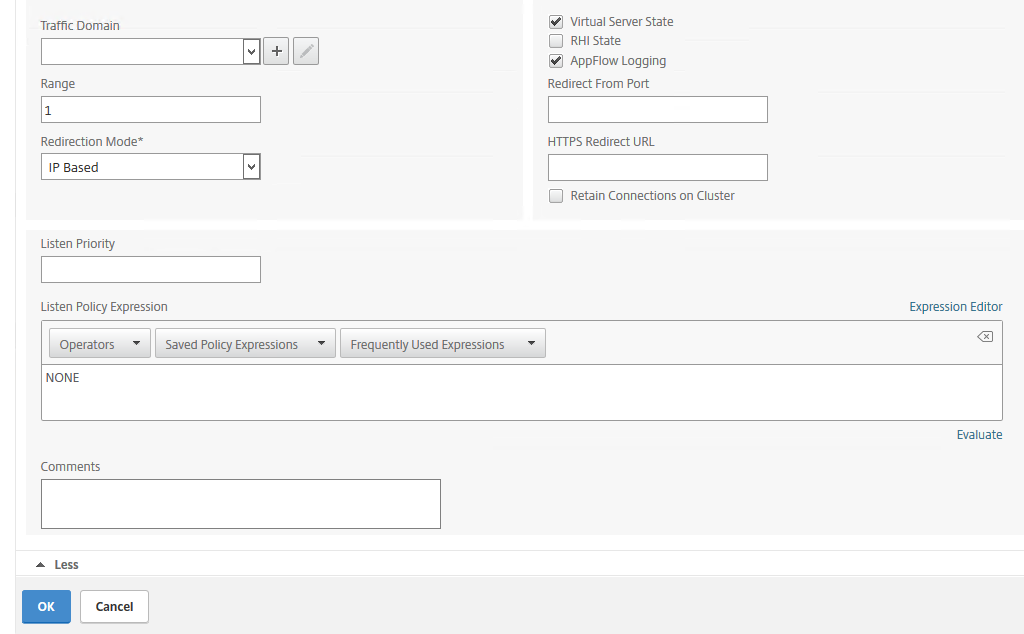
Click More and specify the settings as below (note, that AppFlow logging only needs to be enabled if you have a NetScaler MAS setup or other monitoring solutions that could make use of AppFlow logs)
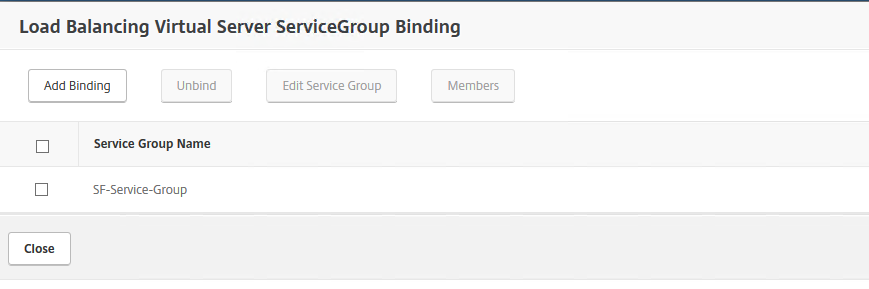
Under Services and Service Groups, click on Load Balancing Virtual Server ServiceGroup Binding
Click Add Binding and select the Service Group that you created in the previous step. Click OK
Once completed, the page should look like the below. Click Close and click Done
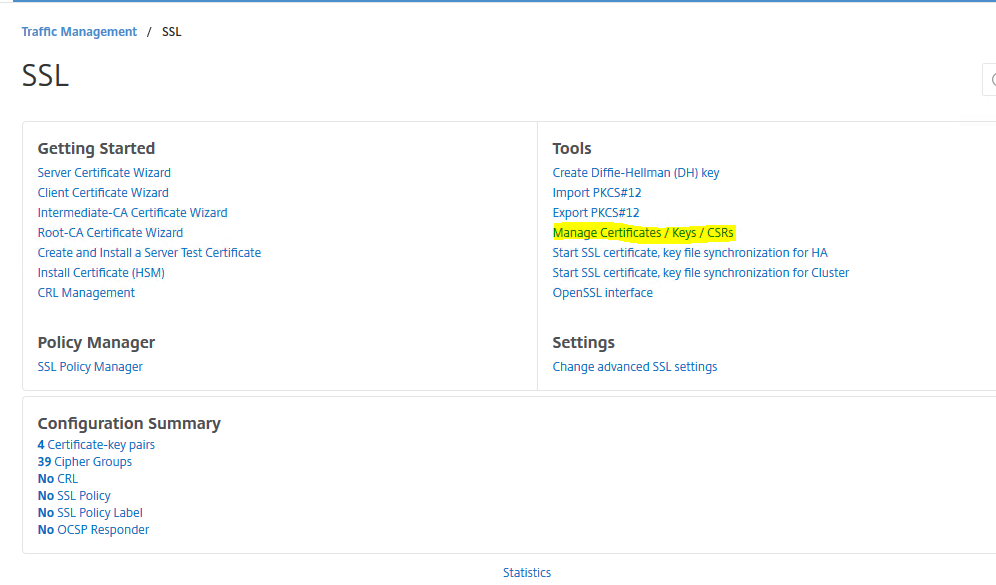
It’s time to attach the certificate. Go to Traffic Management — SSL — Manage Certificates / Keys / CSRs
Click on Upload button and upload your certificate file to NetScaler
Go to Traffic Management — SSL — Certificates — Server certificates
Under Certificate, click on Server Certificate and then Install
Give a certificate key-pair name and choose the certificate that was just uploaded in the previous step. Click Install
Now, go back to Traffic Management –Load Balancing — Virtual Servers
Select the Virtual server created for Storefront and click Edit. Under Certificates, select Server Certificate and then Click Add Binding
Under SSL Ciphers, select the ciphers that you would like to be in place. I am going with the default one. This is not the most secure for a production setup so go with something that’s secure enough for your organization.
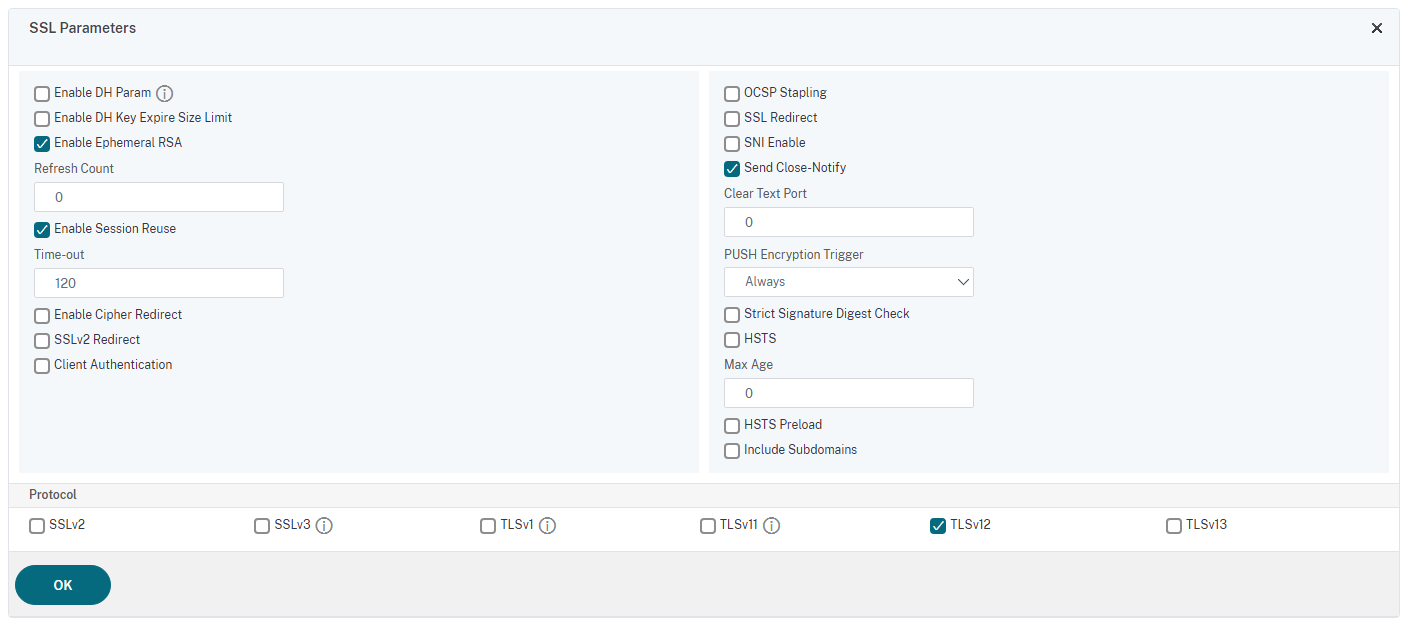
Under SSL Parameters, configure the settings as below. Click OK
Under Method, Select LEASTRESPONSETIME for the Load Balancing Method. Configure a Backup LB Method, I choose LEAST CONNECTION
You can read more about the LB Methods here
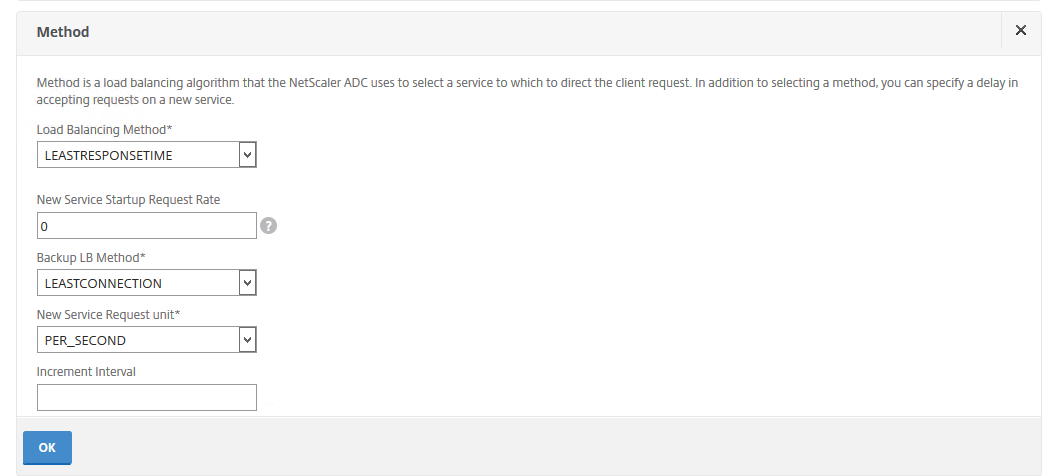
Click OK
Under Persistence, select COOKIEINSERT for Persistence with a time-out value of 0. You can also read why I selected the timeout value of 0 here
Under Backup persistence, select SOURCEIP with a timeout of 60. Fill in the Netmask as in the picture
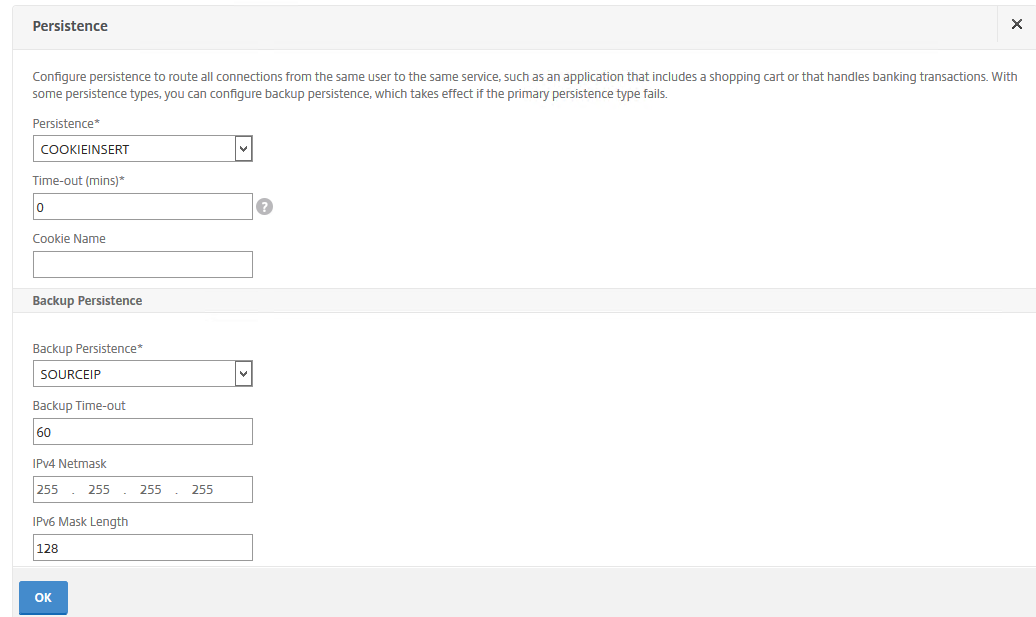
Click OK and then Done
We have now completed almost 90% of the config. There are a couple of things left so hold on tight.
The configuration so far will ensure that load balancing will be performed between the Storefront servers ( I know, i know I haven’t setup the DNS entries for the load balanced VIP)
If someone type in the http URL of LB Storefront in their browser, it will not go anywhere. It will show them the IIS page instead. So how do we ensure that the users are redirected to the correct Storefront page (https version) every single time? We will setup another virtual server on port 80 with a redirect URL configured.
Let’s do that now.
Under Traffic Management –Load Balancing — Virtual Servers, Click Add
Under Basic Settings, give the virtual server a Name and select protocol as HTTP
Specify the same IP address as for the Storefront LB VIP and provide 80 for the Port #
Click OK/Create
Under Persistence, select SOURCEIP with a timeout of 2 mins

Click OK
Under Protection, type in the correct HTTPS URL that you would want the users to be redirected to under Redirect URL field

Click OK. Then click Done
You will notice that the virtual server will be marked as down

DNS Changes
Now head over to the DNS server and open the DNS Console
Create an A record pointing to the Storefront LB name with the IP address configured on the vServer for LB configuration.
Storefront Changes
This is the last step, I promise. Head over to the Storefront servers and it’s time now to run some Powershell commands
Now, the monitors that we created earlier will be marked as Down if we didn’t perform this step prior to creating them on the NetScaler. That’s because the monitor created was based on HTTPS and by default, Storefront monitoring is done on HTTP
To change this to HTTPS. We need to configure the monitor service to use HTTPS instead. On all the StoreFront 3.0 servers perform the following steps.
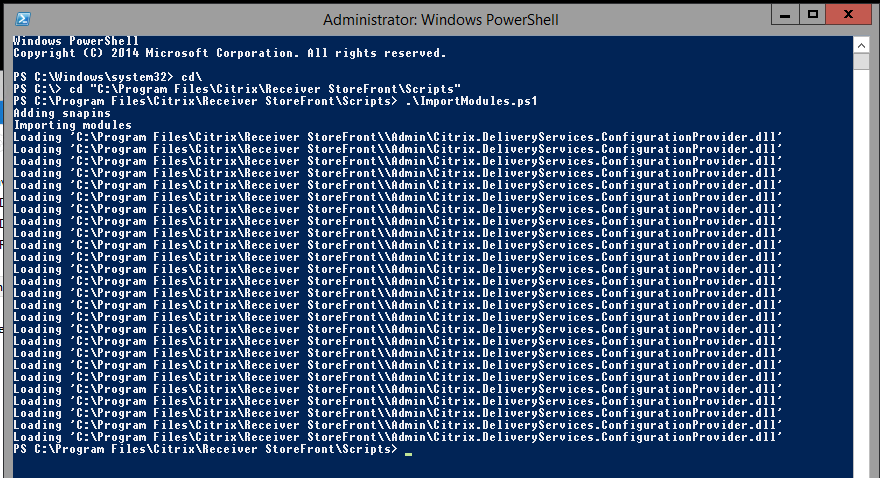
Run PowerShell as an administrator.
Navigate to the Scripts (C:\Program Files\Citrix\Receiver StoreFront\Scripts) folder via the Powershell on the Storefront server,
Run ImportModules.ps1
Run the below command
Get-DSServiceMonitorFeature

Now, type the below to setup the Storefront Monitor on HTTPS
Set-DSServiceMonitorFeature -ServiceURL https://localhost:443/StoreFrontMonitor

Repeat the above steps on all the Storefront servers.
Now, head back to the NetScaler and you can see that the monitor will be in GREEN and showing a status of UP
That’s all we need to do to setup Storefront load balancing using NetScalers.

Leave a Reply