
To all the people out there who had issues when trying to create a machine catalog on versions above 7.9 and wondered why the Disk Cache option is greyed out, here is a potential answer to that issue. This is exactly what I ran into while recreating the catalogs for a customer who wanted to expand their disk space for their XenApp workloads. As you probably might know, the only way to expand the C drive space is by recreating the machine catalog.
XenApp version is 7.15 LTSR which was deployed originally as XenApp 7.5 and later upgraded to 7.15 LTSR version meaning that the original catalogs weren’t created using MCSIO. Having said that this fix will work just fine with newer versions of CVADs as well such as CVAD 1912 LTSR, CVAD 2203 etc
The catalogs that needed Citrix MCSIO turned ON didn’t have the disk cache feature alive in the Catalog creation wizard. See the picture below.

Citrix MCSIO was first introduced in XenApp 7.9 which was supposed to be an alternative to PVS’s own memory cache feature. It is still debatable that if MCS’s memory cache feature is as good as PVS, but admins these days have an alternative if they want to give their workloads a bit of performance boost while running MCS.
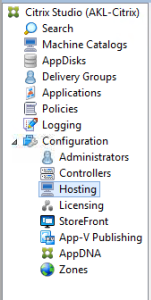
Now, back to the issue! The fix lies in the Hosting Node in Studio where you have/had configured the connection to your hypervisor. In my case, when they were originally created, there was no MCSIO feature around so never had storage options to turn ON back then.
You could either edit the existing Resources under existing Connections.
I chose to create a new Resource under an existing Connection.
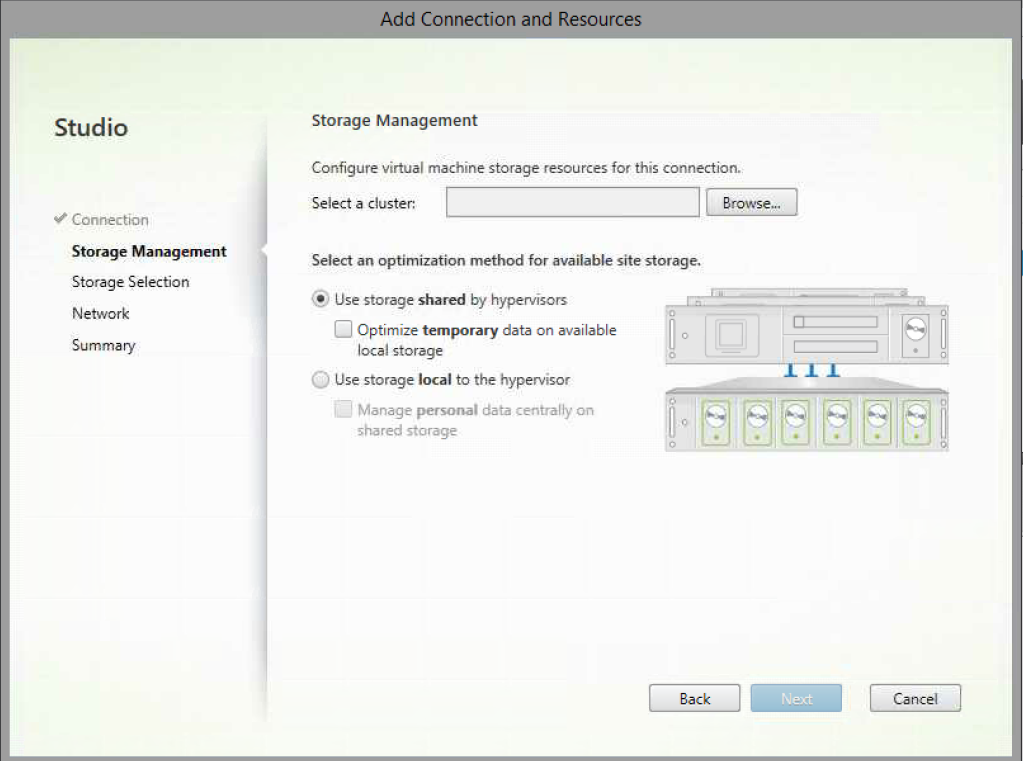
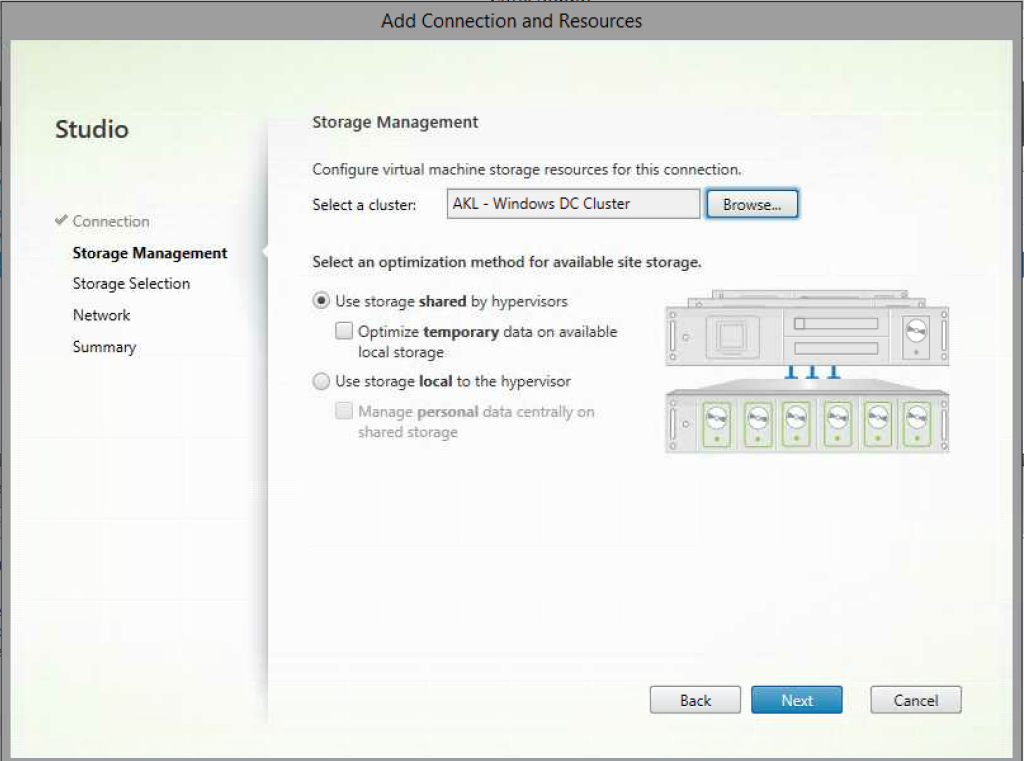
You will basically need to choose a Cluster in your hypervisor farm and choose between Local and Shared storage.
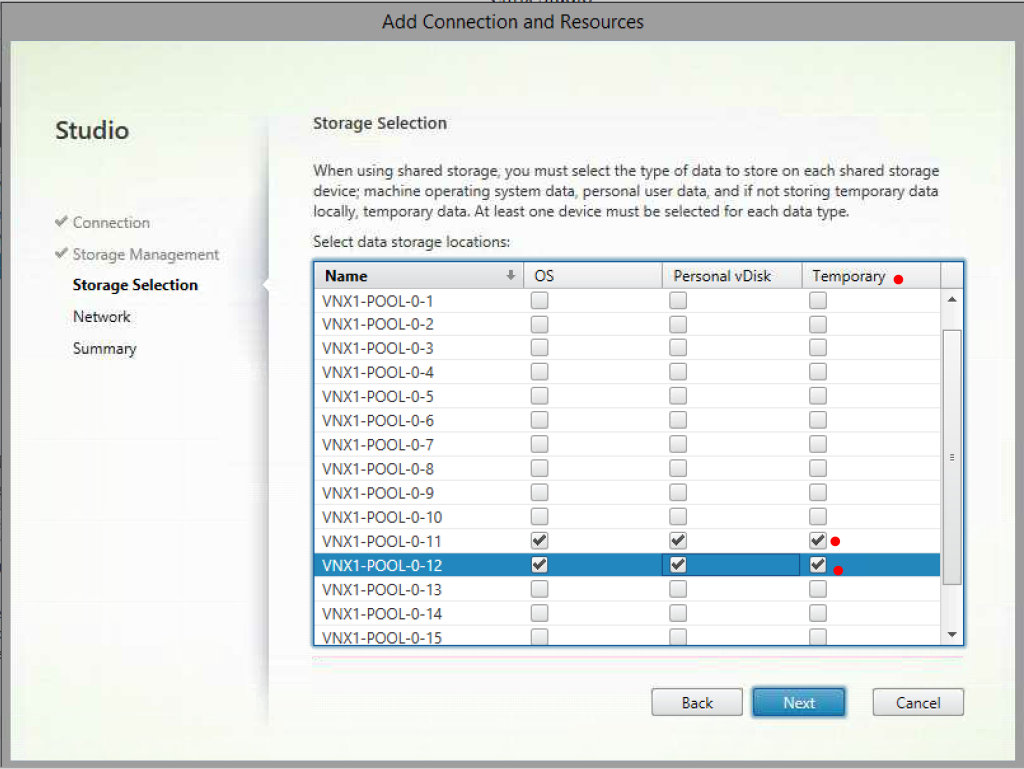
Under Storage Selection, select the datastores for OS, PvD and Temporary Cache. Though PvD is deprecated, it doesnt let you progress unless PvD option is ticked.
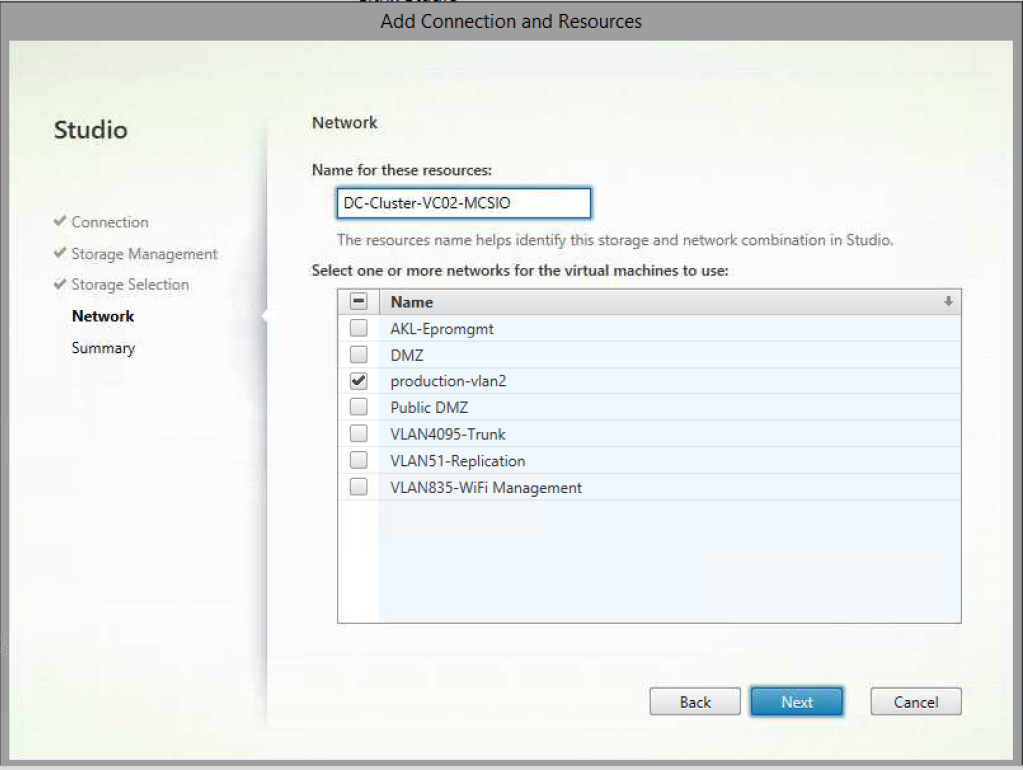
Choose a Name for your Resource and select the Network Adapter.
Click Next
Click Finish at the Summary page.
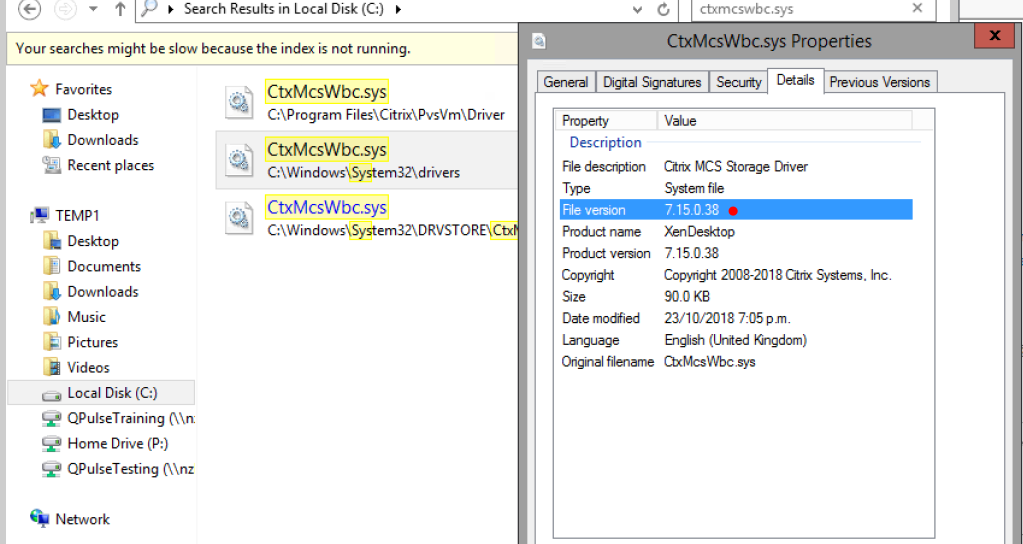
Note – if your MCSIO driver version is older than 7.15.0.38, you will most likely have performance issues. I am running XenApp 7.15 LTSR CU3 which already has the above driver version.
Once you have setup your new Resource under Hosting node, head over to the Machine Catalog node in Studio.
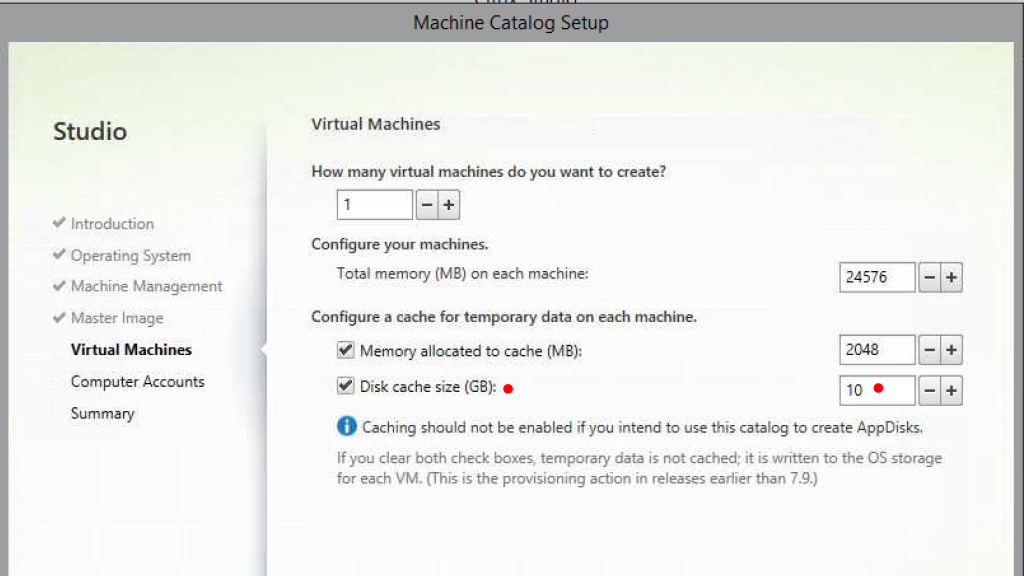
Create a new Machine Catalog and you will see that the Disk Cache option is alive.
Hope this helps somebody out there!

Leave a comment