
Citrix Workspace Environment Manager is a tremendous addition to any Citrix environment. It changes drastically how resources are consumed on the Citrix servers. It will also help you control what the users have access to on Citrix servers, define Start Menu, blacklist and whitelist processes, shift your GPOs to WEM, printer mappings, drive mappings, file type associations and so on. Talk about super fast logins, WEM is a must have. Why do you not have it? It comes free of cost if you have XenApp/XenDesktop Enterprise and above licenses with Citrix Customer Success Services -Select (valid Software Maintenence)
There are tons of literature on setting up WEM on the internet, so I will skip that step and go straight onto some of the best practices and configuration that I have followed for XenApp environments.
Some of the best guides out there for installing WEM are as follows.
https://www.carlstalhood.com/workspace-environment-management/
https://www.jgspiers.com/citrix-workspace-environment-manager/
Baseline WEM Policies
Let’s get started! Please note that all these settings may not be entirely relevant in your environment so enable them with caution or increase/decrease the values to suit your environment. I will explain settings where necessary so that you guys know what they are supposed to do.
I am working with WEM version 4.6, so some of the settings that you are after may not be there or in a different place in the console.
Assuming that you are all set with the WEM, and you have access to the console and you have a configuration set created, below are the settings I will set up right off the bat.
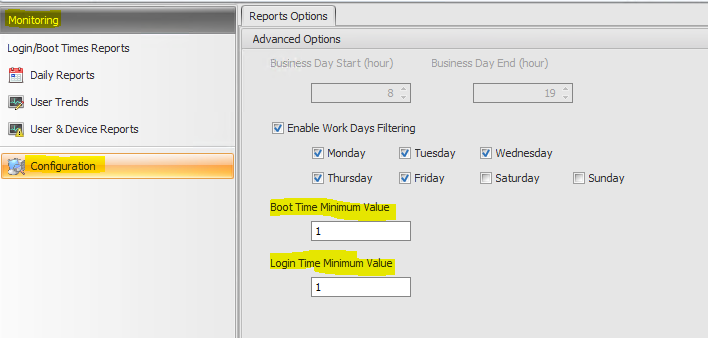
Monitoring
Go to * Monitoring – Configuration – Boot Time Minimum Value and Login Time Minimum Value. Check the values below.
Advanced Settings
* Advanced Settings – Configuration – Main Configuration tab. Some of the settings aren’t being used in my environment so check whats necessary in your case.
Agent Actions. These settings determine whether or not the agent processes actions configured in the Actions tab. These settings apply at login, automatic refresh, or manual (user or administrator triggered) refresh.
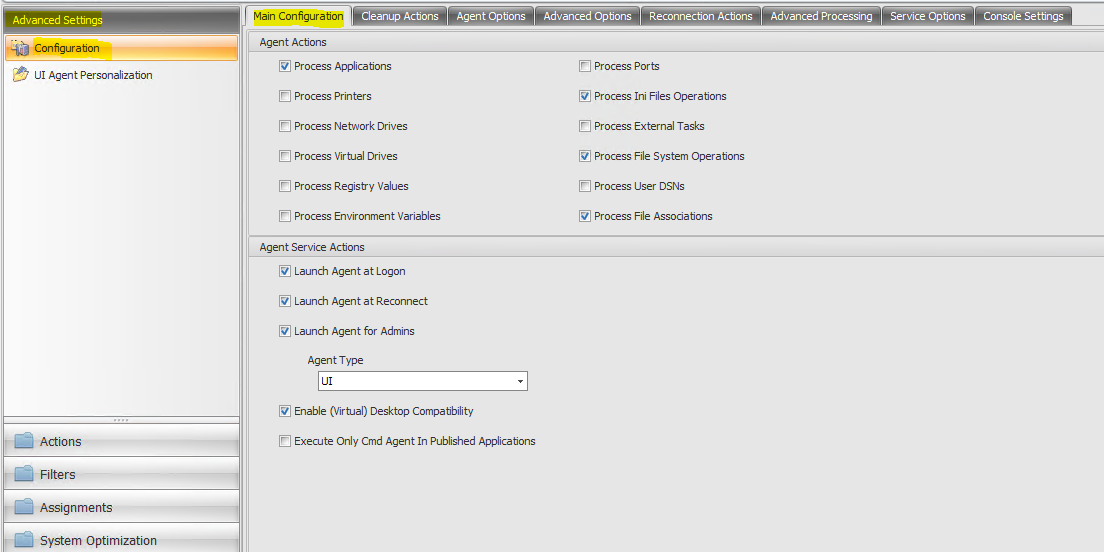
Enable (Virtual) Desktop Compatibility. This setting is necessary for the agent to be launched when the user is logged in to session 1. If you have any users on physical desktops or VDI, select this option.
Execute only CMD Agent in Published Applications. If enabled, the agent will launch in command line mode (CMD) when initiating a published application, rather than in UI mode. CMD mode displays a command prompt instead of an agent splash screen.
Cleanup Actions
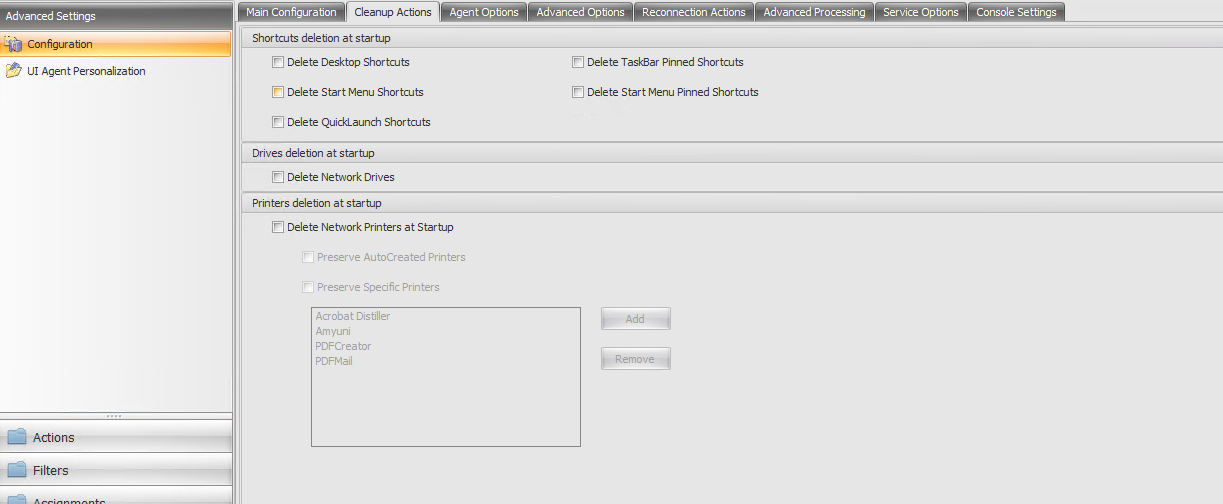
Settings here are self-explanatory
Agent Options
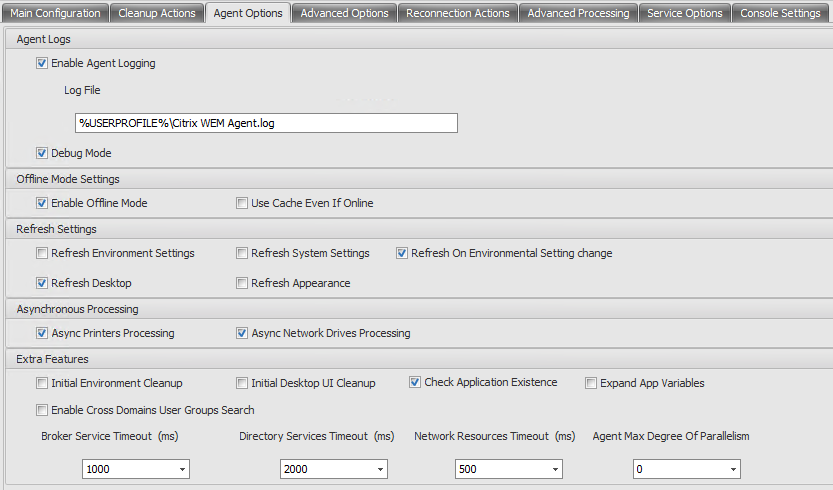
Enable Offline Mode. If this is disabled, the agent does not fall back on its cache if it cannot connect to the infrastructure service. Note For Offline Mode to work, SQL Server Compact Edition 3.5 SP2 must be installed in the user environment and on the Workspace Environment Management infrastructure server.
Initial Environment/Desktop Cleanup. If enabled, the agent cleans up the environment/desktop at first login only. Be careful with this setting! Please test this thoroughly before allowing this in production
Check Application Existence. If enabled, the agent checks that an application is available to the user/group before creating a shortcut to that application.
Expand App Variables. If enabled, variables are expanded by default (see Environment variables for normal behaviour when the agent encounters a variable).
Enable Cross-Domain User Group Search. If enabled, the agent queries user groups in all Active Directory domains. Note: This is an extremely time-intensive process which should only be selected if necessary.
Broker Service Timeout. The timeout value after which the agent switches to its own cache, when it fails to connect to the infrastructure service. The default value is 2000 milliseconds.
Directory Services Timeout. The timeout value for directory services on the Agent Host machine, after which the agent uses its own internal cache of user group associations. The default value is 2000 milliseconds.
Network Resources Timeout. The timeout value for resolving network resources (network drives or file/folder resources located on the network), after which the agent considers the action has failed. The default value is 500 milliseconds.
Agent Max Degree of Parallelism. The maximum number of threads the agent can use. The default value is 0 (as many threads as physically allowed by the processor), 1 is single-threaded, 2 is dual-threaded, etc. In most cases, this value does not need changing. Available in WEM 4.7 onwards
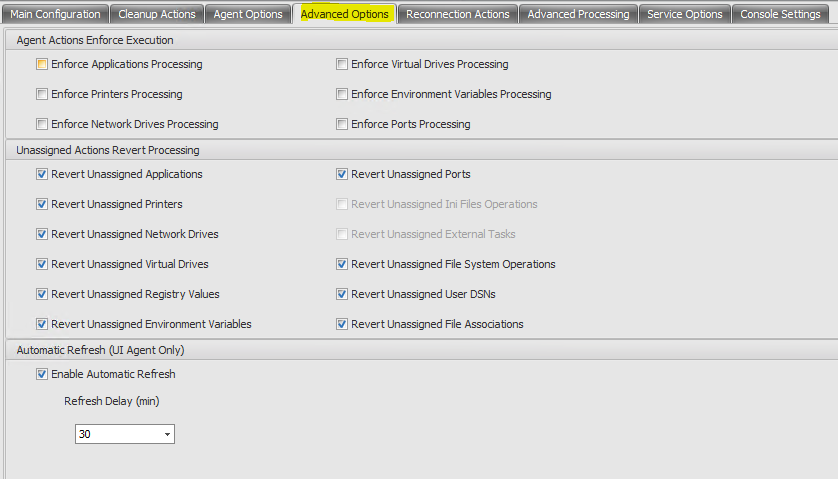
Advanced Options
Enforce Execution of Agent Actions. If these settings are enabled, the Agent Host will always refresh those actions, even if no changes have been made.
Revert Unassigned Actions. If these settings are enabled, the Agent Host will delete any unassigned actions when it next refreshes.
Automatic Refresh. If enabled, the Agent Host will refresh automatically. By default, the refresh delay is 30 minutes.
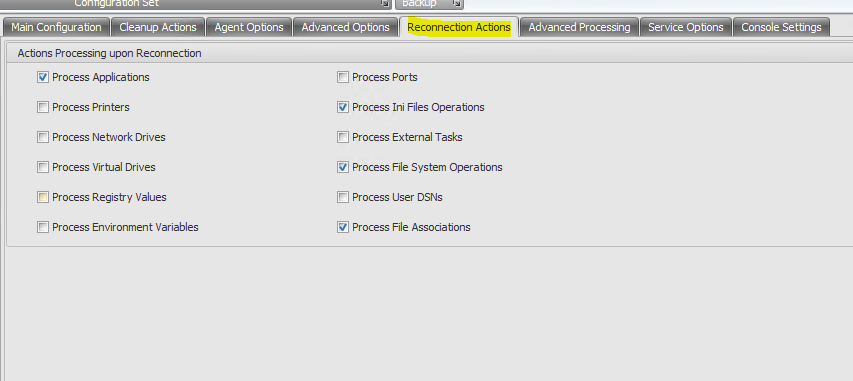
Reconnection Actions
Action Processing on Reconnection. These settings control what actions the Agent Host processes upon reconnection to the user environment.
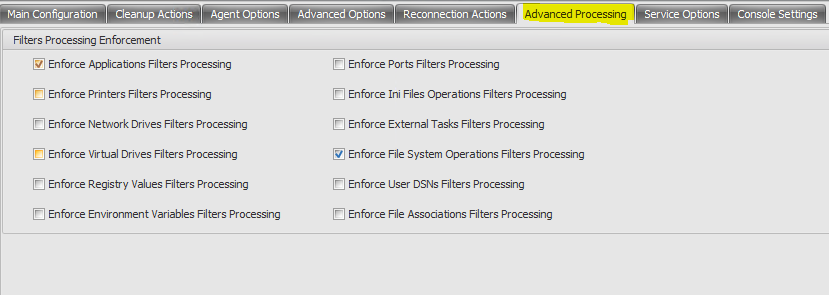
Advanced Processing
Filter Processing Enforcement. If enabled, these options will force the Agent Host to re-process filters at every refresh.
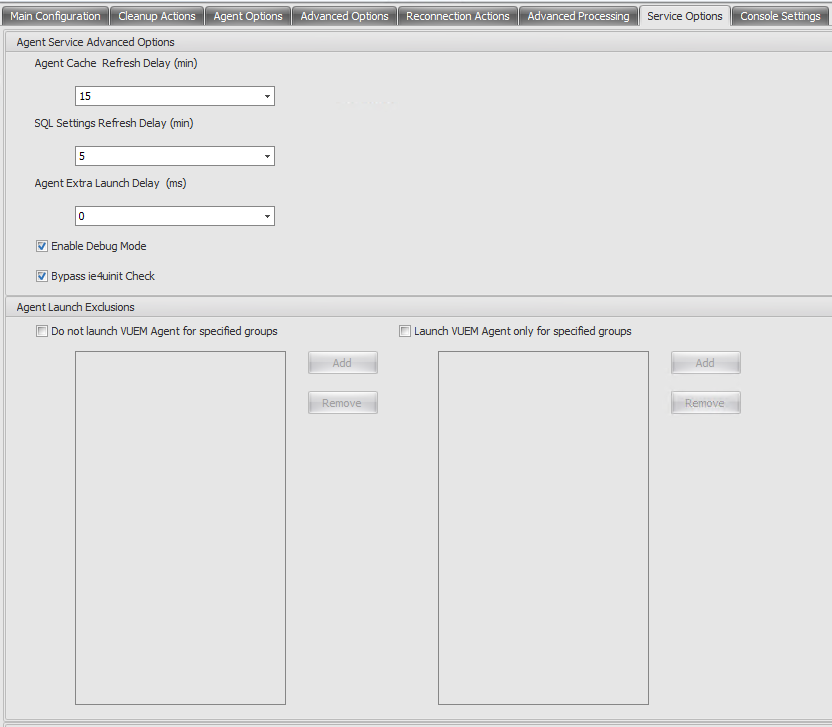
Service Options
These settings configure the Agent Host service.
Agent Cache Refresh Delay. This setting controls how long the Agent Host service will wait to refresh its cache.
SQL Settings Refresh Delay. This setting controls how long the Agent Host service will wait to refresh its SQL connection settings.
Agent Extra Launch Delay. This setting controls how long the Agent Host service will wait to launch the Agent Host executable.
Enable Debug Mode. This enables verbose logging for all Agent Hosts connecting to this site.
Bypass ie4uinit Check. By default, the Agent Host service will wait for ie4uinit to run before launching the Agent Host executable. This setting forces the Agent Host service to not wait for ie4uinit.
Agent Launch Exclusions. If enabled, the Citrix Workspace Environment Management Agent Host will not be launched for any user belonging to the specified user groups.
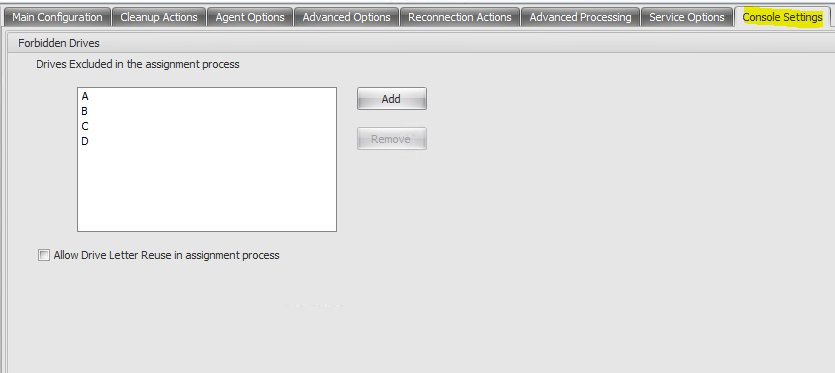
Console Settings
Forbidden Drives. Any drive letter added to this list is excluded from the drive letter selection when assigning a drive resource.
UI Agent Personalization
These settings let you customize the appearance of the session agent (in UI mode only) in the user’s environment.
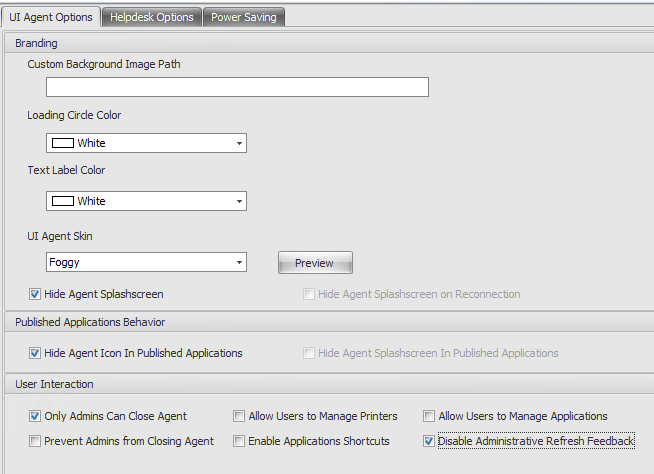
UI Agent Options
Disable Administrative Refresh Feedback. When Administrators force a session agent to refresh from the Administration Console, this option prevents a notification tooltip appearing in the user environment. This will disable all the user interactions/notifications with WEM Agent. Very useful to have!
HelpDesk Options
These options control the Agent Host’s help desk functionalities.
Help Link Action. This field controls what happens when the user clicks on the Help command in the Citrix Workspace Environment Management Agent Host.
Custom Link Action. This field controls what happens when the user clicks on the Support command in the Citrix Workspace Environment Management Agent Host.
Enable Screen Capture. If enabled, users are given the option to open a screen capture utility. This allows the user to screenshot any errors in their environment, which they can then send to your support staff.
Enable Send to Support Option. If enabled, the user is able to send screenshots and log files directly to the nominated support email address, with the specified template. This requires a working, configured email client.
Custom Subject. If enabled, the support email generated by the Citrix Workspace Environment Management Agent Host screen capture utility is sent with the specified subject.
Email Template. This field allows you to specify a template for the support email generated by the Citrix Workspace Environment Management Agent Host screen capture utility. Note You must configure the email template to include useful information.
See Dynamic tokens for a list of hash-tags which can be used in the email template. Note Users are only presented with the option to enter a comment if the ##UserScreenCaptureComment## hash-tag is included in the email template.
Use SMTP to Send Email. If enabled, this will send the support email using SMTP instead of MAPI.
Test SMTP. Tests your SMTP settings as entered above to verify that they are correct.
Power Saving
Shut Down At Specified Time. If enabled, the Agent Host will automatically shut off the environment it is running in at the specified local time.
Shut Down When Idle. If enabled, the Agent Host will automatically shut off the environment it is running in after running idle (no user input) for the specified length of time.
I don’t have anything set up for power options as they are more for VDI and servers running in the cloud for cost savings.
Transformer Settings
These options allow you to configure the Transformer feature. Transformer allows agents to connect as web/application launchers which redirect users to the configured remote desktop interface. Use Transformer to convert any Windows PC into a high-performance thin client using a fully reversible ‘kiosk’ mode.
I don’t currently utilize this feature for my customer deployment.
Active Directory Objects
Use this page to specify the users, computers, groups, and organizational units you want to be managed by Workspace Environment Management.
Advanced – AD Settings
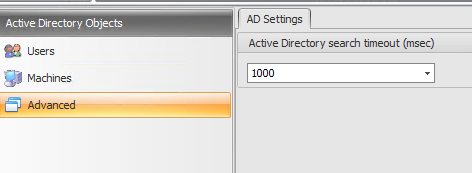
Active Directory search timeout. The time period (msec) for Active Directory searches to be performed before they time out. The default value is 1000 msec. I recommend using a timeout value of at least 500 msec to avoid timeouts before searches complete.
Security
These settings allow you to control the applications users are permitted to run by defining rules. This functionality is similar to Windows AppLocker. When you use Workspace Environment Management to manage Windows AppLocker rules, the agent processes (converts) Application Security tab rules into Windows AppLocker rules on the agent host. If you stop the agent processing rules, they are preserved in the configuration set and AppLocker continues running by using the last set of instructions processed by the agent.
Application Security
Process Application Security Rules. When selected, the Application Security tab controls are enabled and the agent processes rules in the current configuration set, converting them into AppLocker rules on the agent host. When not selected, the Application Security tab controls are disabled and the agent does not process rules into AppLocker rules. (In this case, AppLocker rules are not updated.)
Process DLL Rules. When selected, the agent processes DLL rules in the current configuration set into AppLocker DLL rules on the agent host. This option is only available when you select Process Application Security Rules.
Important: If you use DLL rules, you must create a DLL rule with “Allow” permission for each DLL that is used by all the allowed apps.
Caution: If you use DLL rules, users may experience a reduction in performance. This happens because AppLocker checks each DLL that an app loads before it is allowed to run.
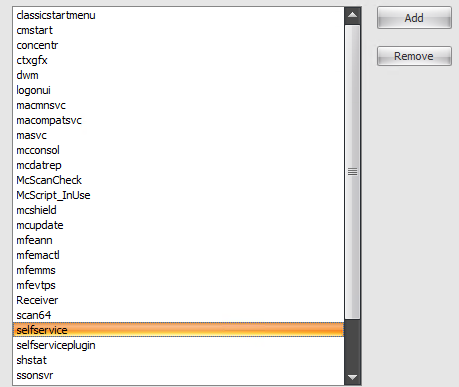
Process Management
Lets you define what is allowed to run and what isn’t.
This helps you apply software licensing restrictions (well, in a less intuitive way) using blacklisting. The only caveat is that you will NOT be able to set up individual restrictions for applications. They are managed as a list of processes with a list of groups that will have access to run them. Hence, this will not serve the purpose when you have a list of applications that need to be restricted. Look at Application Security, if you have multiple applications.
Note: This option only works if the session agent is running in the user’s session. To do this use the Main Configuration Agent settings to set the Launch Agent options (at Logon/at Reconnect/for Admins) to launch according to the user/session type, and set Agent Type to “UI”. These options are described in Advanced Settings.
Be super careful with Whitelisting as the moment you add a process in there, WEM will stop all the other processes from running. The safe bet will be using blacklisting unless it is a greenfield environment.
Policies and Profiles
Environmental Settings
These options modify the user’s environmental settings. Some of the options are processed at logon, while some others can be refreshed in session with the agent refresh feature.
Under the known Folders Management tab, Disable Specified Known Folders prevents the creation of the specified user profile known folders at profile creation.
Here is the link to the Canonical names for the Control Panel applets
System Optimization
Although system optimization settings are machine-based and apply to all user sessions, process optimization is user-centric. This means that when a process triggers CPU Spikes Protection in User A’s session, the event is recorded for User A only. When User B starts the same process, process optimization behavior is determined only by process triggers in User B’s session.
Tip
When your virtual machines have different hardware configurations, consider creating multiple configuration sets for them, and configuring the system optimization settings differently for each configuration set. Machines can only belong to one configuration set.
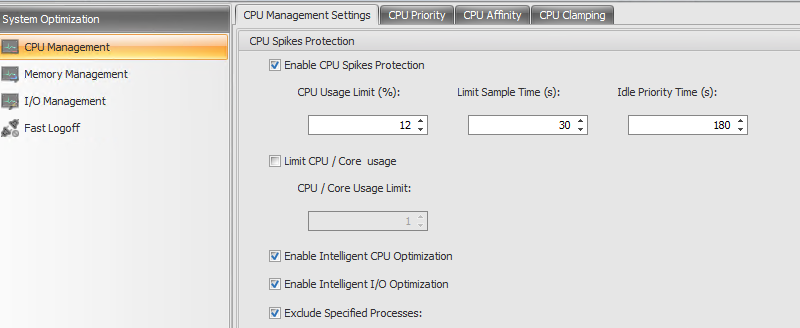
CPU Management
Enable CPU Spikes Protection. Lowers the CPU priority of any process which exceeds the configured percentage of CPU usage, for a configurable period of time.
Whenever a specific process triggers Spike Protection, the event is recorded in the agent’s local database. The agent records trigger events for each user separately. This means that CPU Optimization for a specific process for User A does not affect the behavior of the same process for User B.
- Limit Sample Time. This is the time for which a process must exceed the CPU Usage Limit before its CPU priority is lowered.
- Idle Priority Time. This is the length of time the process’ priority is lowered. After this time expires, the process CPU Priority returns to its original level.
Exclude Specified Processes. By default, WEM CPU Management excludes all of the most common Citrix and Windows core service processes. You can, however, use this option to Add or Remove processes from an exclusion list for CPU Spikes Protection by executable name (for example notepad.exe). Typically, antivirus processes would be excluded.

There is a good summary of how you want to set this up here https://docs.citrix.com/en-us/workspace-environment-management/current-release/user-interface-description/system-optimization/cpu-management.html
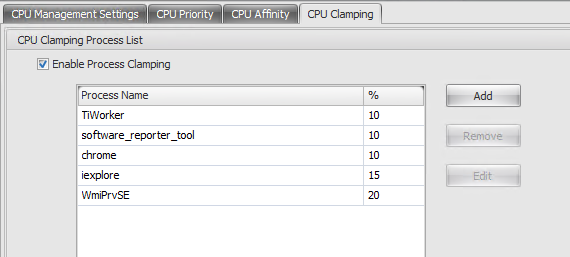
CPU Clamping
CPU clamping is a brute force approach which is computationally expensive. To keep the CPU usage of a troublesome process artificially low, it is better to use CPU Spikes Protection, at the same time as assigning static CPU priorities and CPU affinities to such processes. CPU clamping is best reserved for controlling processes which are notoriously bad at resource management, but which cannot stand to be dropped in priority.
To find out if CPU Clamping is working, follow the Citrix KB below
https://support.citrix.com/article/CTX226272
I don’t have any CPU Affinity and Priority policies configured. If you want to know why they are there and what they are supposed to do, follow this Citrix blog post-https://www.citrix.com/blogs/2018/07/03/the-best-kept-secret-at-citrix/
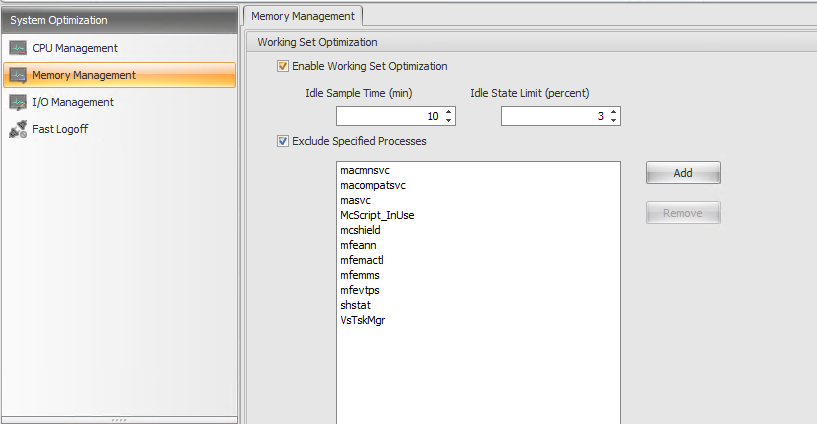
Memory Management
These settings allow you to optimize application RAM usage.
Note
Please note that enabling this will increase the disk usage if the pagefile has been setup to system managed pagefile size. Change it to use a fixed pagefile size after performing some calculations. This is also found to increase the storage IO so if you see similar issues in your environment, come back and check the Memory Optimization settings. May be play around with it a bit and change the settings to a conservative value such as 30 mins for Idle Sample Time
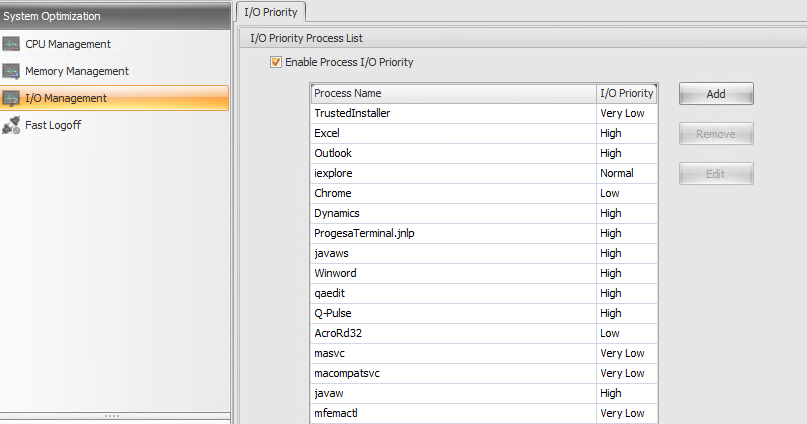
IO Management
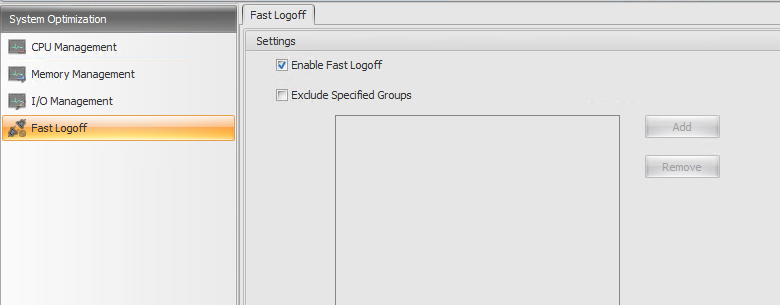
Fast Logoff
Fast Logoff ends the HDX connection to a remote session immediately, giving users the impression that the session was immediately closed. However, the session itself continues through the session logoff phases in the background on the VDA.
Note
Fast Logoff supports XenApp and RDS resources only.
Now, there are Actions, Filters and Assignments which I am not going to talk to you about now as you will have a completely different set of applications and rules that you would like to apply in your environment.
It’s been a long post, and since I need a coffee desperately, I will talk about setting up applications, network drives, printers, file associations and so on in another blog post. There are a few blogs currently out there that have step-by-step instructions on how to do that. Feel free to comment with any useful tips and the good stuff that you are doing in your environment using WEM. Adios!

Leave a comment