AppDisk is an awesome technology from Citrix but it comes with its own quirks which admins/consultants should be aware of. Below are some of the items that i thought are important to know about the technology and how to set it up.
There are a few things to keep in mind before attempting to create an AppDisk.
- AppDisks will only work with virtual machines
- AppDisk creation from the Studio doesn’t work with manually built servers.
- You will need to have a machine catalog based on MCS or PVS. While building the catalog, the wizard will hook into the PVS Stores and “reserve” a VM for AppDisk creation.
- You will also need to set up a service account in the hypervisor of your choice. Follow the info here for the account permissions.http://docs.citrix.com/en-us/xenapp-and-xendesktop/7-8/install-configure/install-prepare/vmware.html
- AppDisks require additional permissions for it to function correctly which is specified in the above link. https://support.citrix.com/article/CTX219093

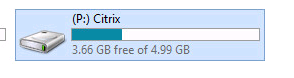
- when you specify a size for the AppDisk, you wouldn’t be able to utilize all the size that you allocated. for eg, for an AppDisk size of 5 GB only, 3.66 are useable so always give some extra when creating appdisks
- Don’t create snapshots of the machine prior to creating the AppDisk when using MCS Catalogs
- There is currently no way to resize the AppDisk from within the Studio. PowerShell is the way to go.
- There is NO versioning built into AppDisks at this stage. All that you are doing when clicking on “Create New Version” is creating a clone of the existing AppDisk which could be used to edit and update the AppDisk
- Enable both the Shadow Copy and Microsoft Software Shadow Copy Service Provider services. https://support.citrix.com/article/CTX211853
- Some of the commands that you will find useful when working with AppDisks are as follows
>Get-AppLibAppDisk
>Get-AppLibTask
To get a list of all the active tasks running, run the below
>Get-AppLibTask -active $true
To stop a particular task, run the Get-AppLibTask and take a note of the task ID
>Stop-AppLibTask
The above stop command will not remove the failed task from the Studio console. to remove it completely from the studio, run the following command
>Remove-AppLibTask
- In many cases, AppDisks work on different OSs. For example, you can add an AppDisk that was created on a Windows 7 VM to a Delivery Group containing Windows 2008 R2 machines, as long as both OSs have the same bitness (32 bit or 64 bit) and both support the application. However, Citrix recommends you do not add an AppDisk created on a later OS version (such as Windows 10) to a Delivery Group containing machines running an earlier OS version (such as Windows 7), because it might not work correctly.
- Finally, the link here from Citrix is a MUST READ as it covers a lot of information on MCS type and PVS type deployments https://docs.citrix.com/en-us/xenapp-and-xendesktop/7-8/install-configure/appdisks.html
Creation Process
- Boot the reserved VM into the Maintenance environment and leave it at the login screen
- Head to the Studio console and select the AppDisk node. Click Create AppDisk
- Specify the size of the disk and a name of the AppDisk in the wizard.
- As soon as the AppDisk creation begins, the VM will be restarted. Boot the VM back into the Maintenance vDisk
- Now wait for the process to complete
- In the mean time, you would be able to see a drive mapping with label (Citrix) being created on the VM with the specified disk size of the AppDisk (5 GB in my case)
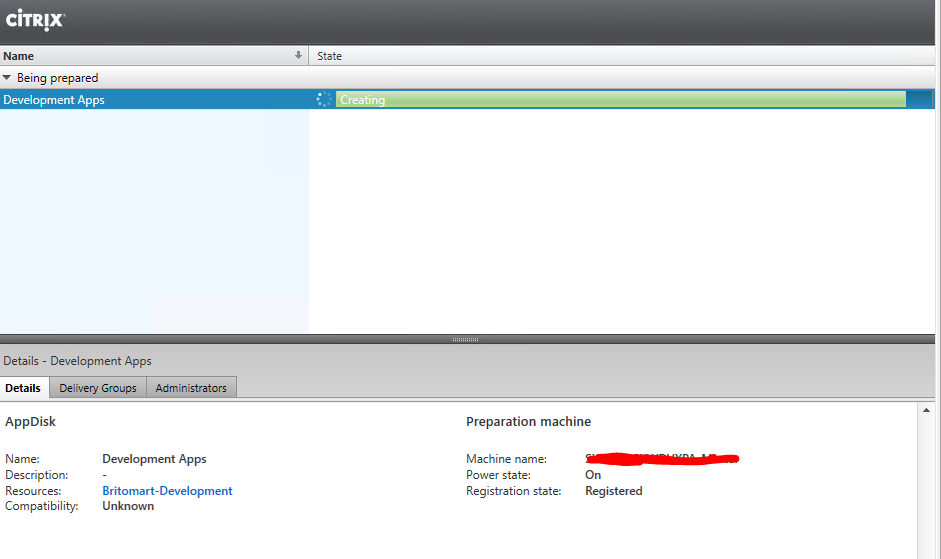
- Refresh the Studio console to ensure that the VM is powered ON and is registered.

- Be patient as this could take while to complete.
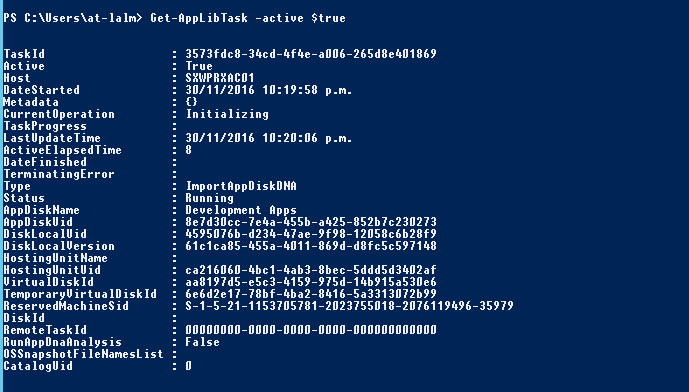
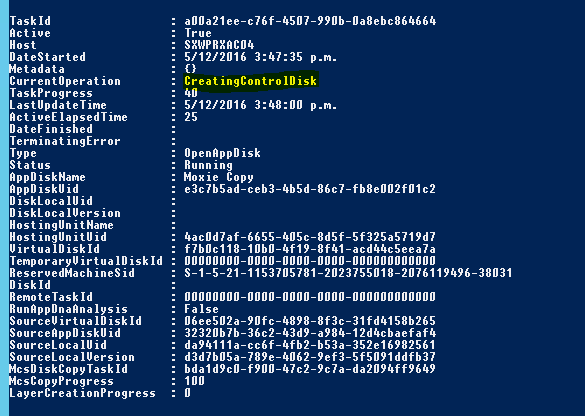
- If the process gets stuck at “Creating…..” state, run the command
Get-AppLibTask -active $true
Check the value of TaskProgress and if it is at 95%, its time to restart the VM.
- Once restarted, boot the machine back into the Maintenance disk
- Ensure that the VM is registered. Login to the VDA now and make sure that the AV agent isnt running (I have seen that logging into the server helps speed up things)
- The AppDisk creation process should now be complete.
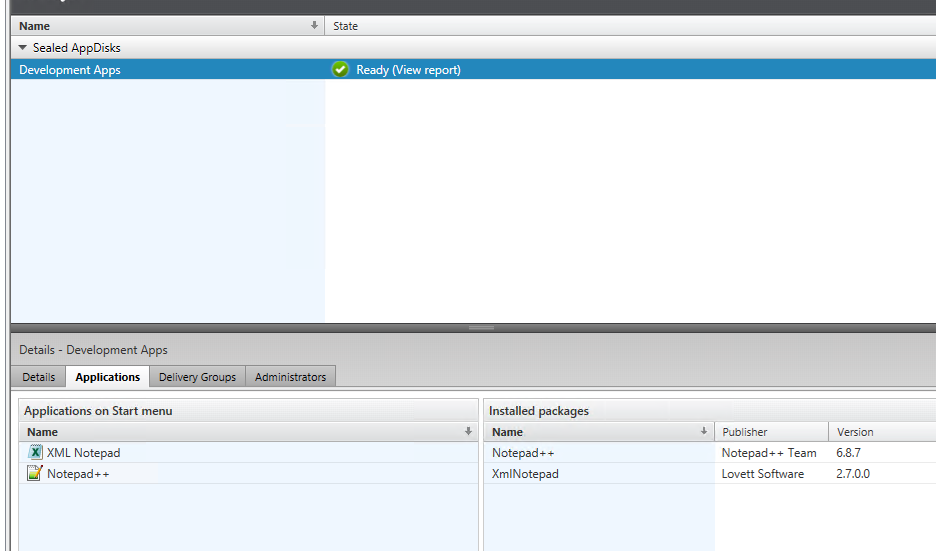
- Its time now to install the applications- Right click the AppDisk name and select Install Applications
- Once you are happy with the app install, its time to seal the disk
- Right click and select “Seal AppDisk”
- When the sealing process is started, the VM will restart. Just ensure that the VM restarts back into the maintenance disk
- Once the server is back up, log into the server to speed up the sealing process. if there are AV agents running, temporarily disable it
- The VM will restart again
- choose the maintenance disk again and boot into it
- it is at this stage, it will start AppDNA disk analysis (assuming that you have AppDNA integration configured)
- Refresh the Studio now and you can see the Appdisk is at Ready(AppDNA:Capturing) state
- Soon the process should complete. The AppDisk should now be ready for app delivery
- Head on to the PVS console and delete the Maintenance vDisk that was initially created for AppDisk . Once the AppDisk is sealed, you MUST boot into the vDisk version before the Maintenence version to be able to see the applications installed on the AppDisk. Strange but true 🙂
- If you need to edit(add more apps) a Sealed Appdisk, create a fresh Maintenance vDisk and continue with the updates. The older Maintenance vDisks will not work once sealed and should be removed from PVS console (Versioning)
Assigning an AppDisk
As previously stated, AppDisks require a machine catalog that isnt assigned to any delivery groups. So naturally the first step after creating an AppDisk is to create a delivery group and attach the AppDisk to it.
Updating an AppDisk
- Create a Maintenance vDisk from the PVS Console
- Change the VM type to Maintenance in the PVS Console (Device Collections)
- If the Prep machine is already a member of a Delivery group, remove it from the delivery group.
- Boot the Prep VM into the Maintenance vDisk and leave it at the login screen
- Go to AppDisk node in Citrix Studio and select the AppDisk that needs to be updated.
- Choose Create New Version
- Give it a name and select the Machine catalog name where the prep machine resides
- Click Create New Version
- At this point, it creates a Control Disk
- The Prep VM will now restart. the next step is to “Reserve” the Virtual machine
- Boot the VM back into the Maintenance vDisk

- It then proceeds with the Layer creation and completes it. It would say ready to install applications in Studio
- Proceed to install applications as you would normally do
- Seal the Appdisks when completed.
- Delete the Maintenance version from the PVS console and change the VM type to Production from Maintenance
Diagnosing issues with AppDisk
AppDisks come with a logging tool that could be found here at C:\Program Files\Citrix\personal vDisk\bin\CtxAppDisksDiag.exe
Run the above tool as an admin and select the folder where you would like to see the log files and click OK
Importing an AppDisk
There are times you will need to import a pre-created AppDisk to the Studio. This method will also work for the manually built virtual machines.
Carl Stalhood has detailed the process to import AppDisks in his blog post here

Leave a comment